 My new friend, Camie, walked me through this great stencil t-shirt project. I love the way it turned out and now my head is spinning with all sorts of variations on this idea. Start to finish it took about 45 minutes, top.
Here is a step by step of the process: 1. Print out your stencil image (easy tutorial here on creating one from a photo) and tape on top of freezer paper (found at grocery store).
2. Using an exact-o knife, cut out the black sections.
3. Iron on the stencil cut out of freezer paper onto a t-shirt.
4. Using fabric paint, dab the stencil with paint thoroughly.
5. Dry briefly with a blow dryer (only takes a couple minutes).
6. Apply paint again, blow dry again until desired color is reached.
7. Tear off paper carefully.
7. Voila! Wait a couple days to wash it.
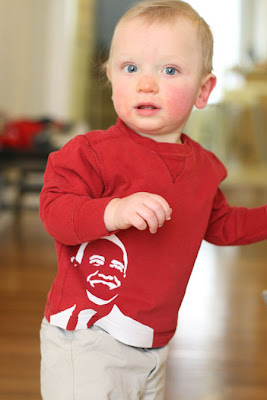
Look how cute Camie’s turned out? Now Joel and Baby Hank are Obama twiners.
PS Isn’t Baby Hank looking so grown up?