I’m putting the finishing touches on the joint kids room now and am excited to show it to you soon! It’s been a real challenge to bring together elements for both a 6 yr old boy and 9 month old girl.
ONE FUN THING THOUGH!

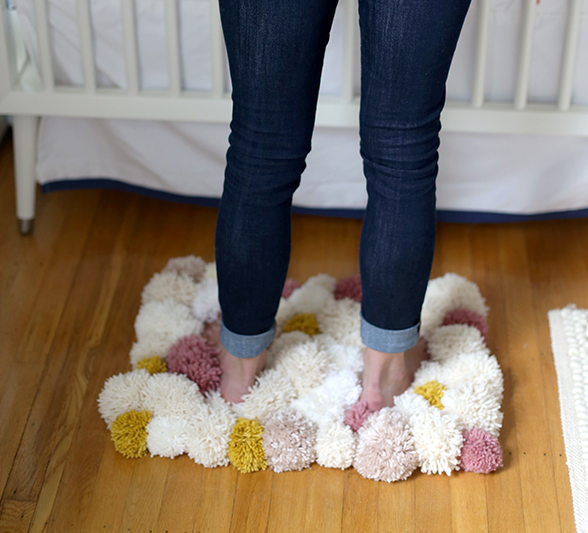
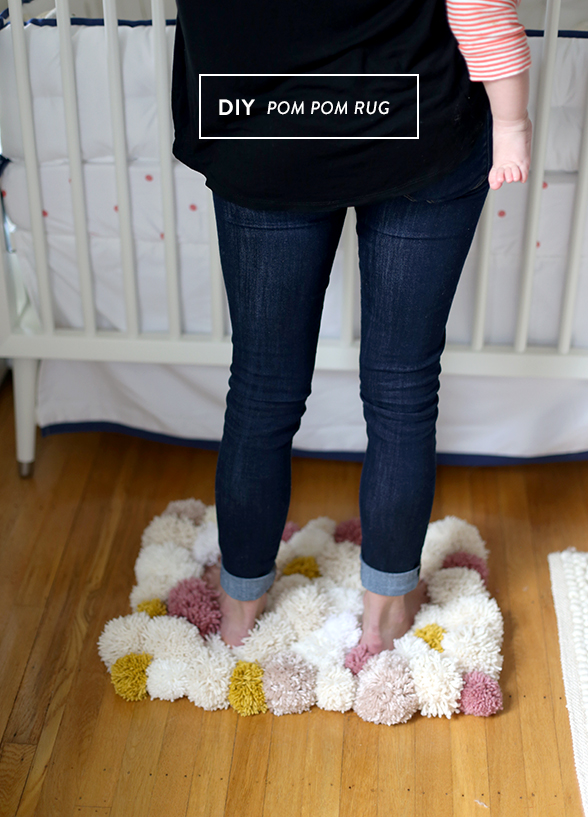
I’m sharing one project for the room today: a DIY pom pom rug.
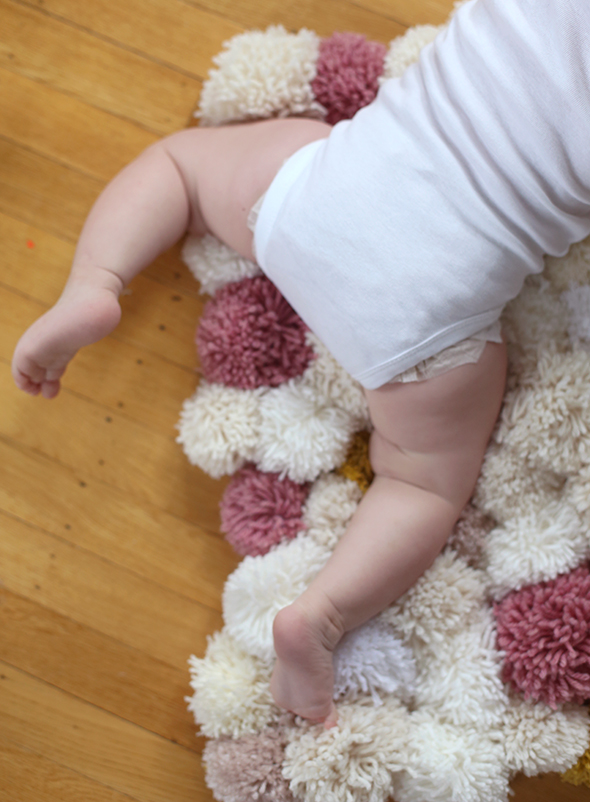
I wanted to make something soft to stand on and soothe Edie in her crib when she got up in the middle of the night, and thought a DIY pom pom rug would be the perfect addition.
Also, it adds a touch of feminine when the room is feeling much more masculine right now.

I mean, don’t you want to wiggle your toes on this soft rug too??
I’m a big fan of pom poms. Have you made them before?
A COUPLE OTHER FUN POM POM PROJECTS:
and a really easy Pom Pom Necklace Crafts with Kids
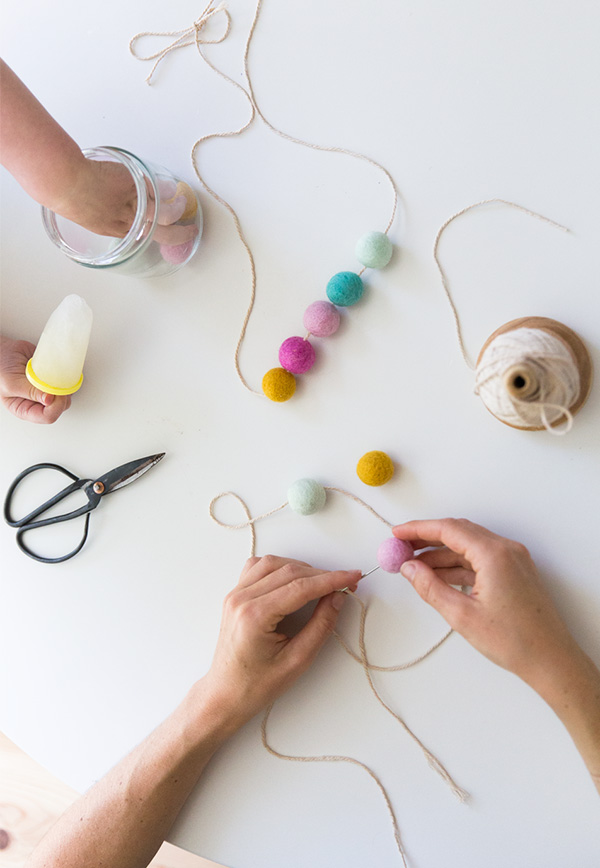
LOTS of fun things to make with pom poms.
HERE’S HOW TO MAKE THE POM POM RUG:
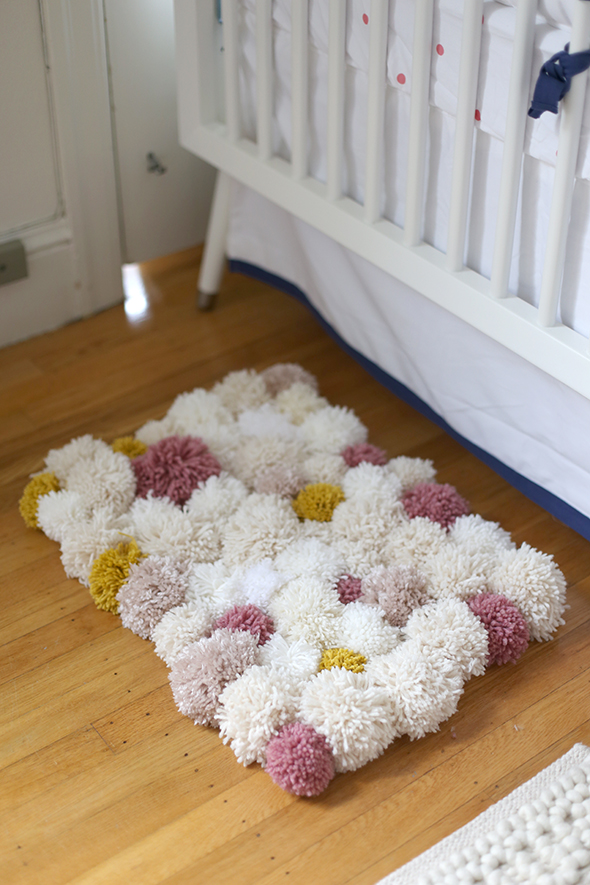
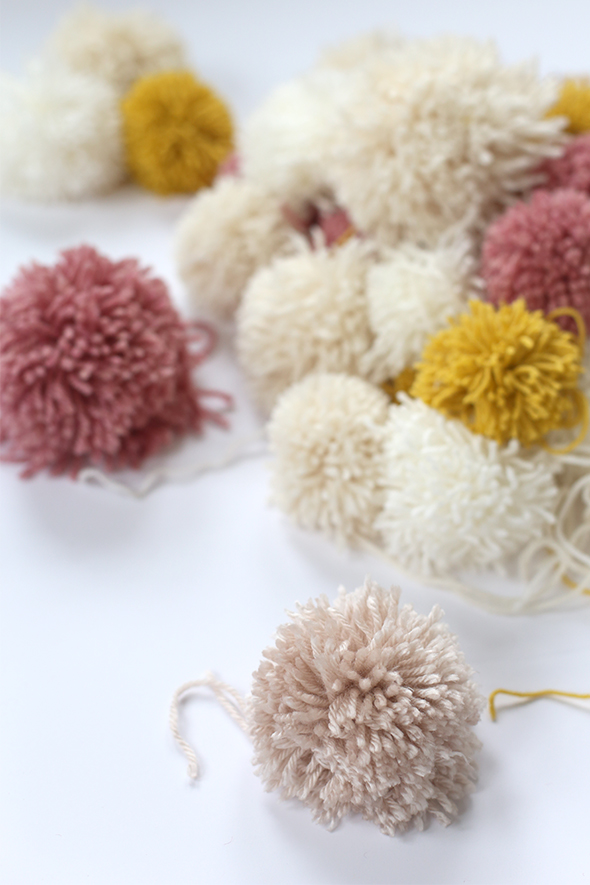
For the color combination, I really wanted something pretty neutral with a few pops of pink and yellow.
I really love how it turned out.
WANT TO LEARN HOW TO MAKE ONE TOO?
Amazing what you can do with yarn and scissors and a little time.
Keep reading to see the step by step instructions on how we made it…
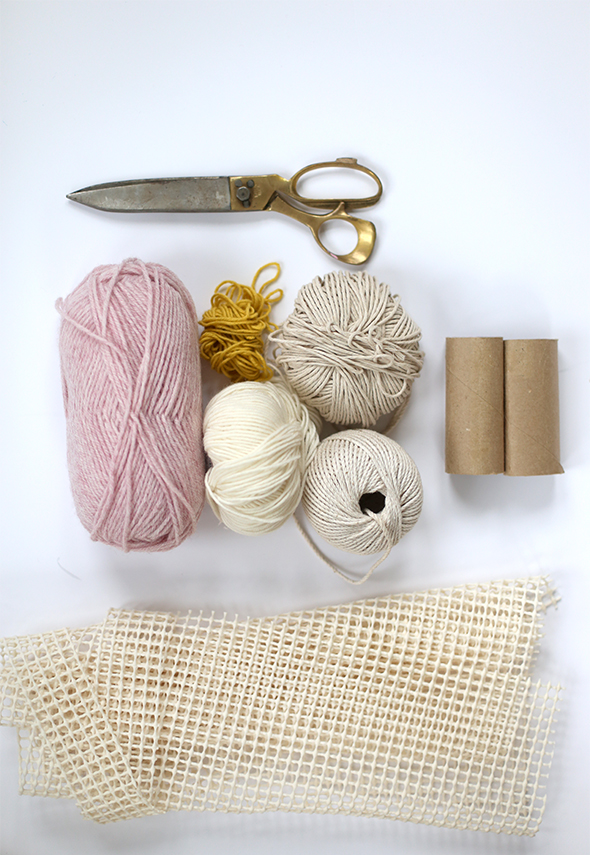
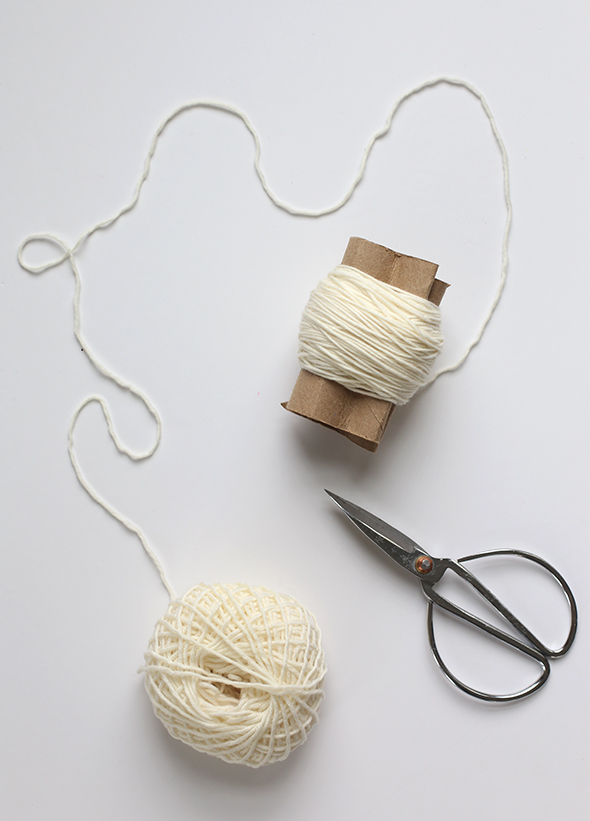
SUPPLIES:
Wool yarn of various sizes, textures, colors of your choosing
Two toilet paper rolls
Scissors
Non stick rug mat in the size you want your rug to be (we bought ours larger and then cut it down). You should be able to find one at your local hardware store
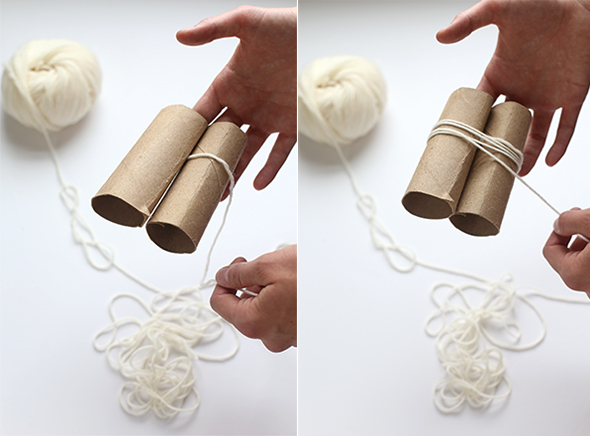
STEP 1: Stick your fingers into the rolls and start wrapping the yarn around both.
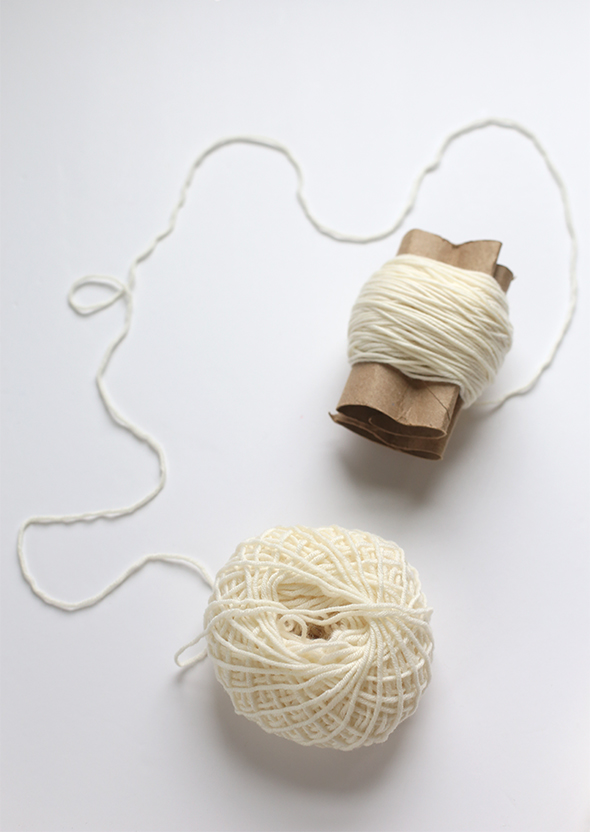
STEP 2: Keep going until it looks about this size or even larger.
Our rolls were so squished because they had been used a lot but yours might not get as squished at first. The sizes will differ but that’s okay!
We liked the look of the rug to have different size pom poms. This one above was for a smaller pom pom, the rolls below are for a larger one.
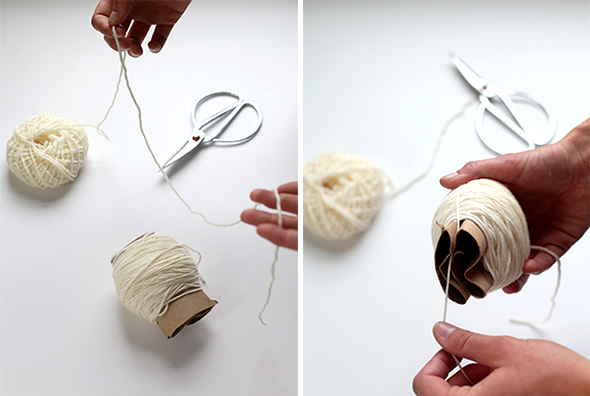
Step 3: Cut another piece of string and weave it through both of the rolls so it wraps around the whole thing.

Step 4: Tie once, then pull the rolls out
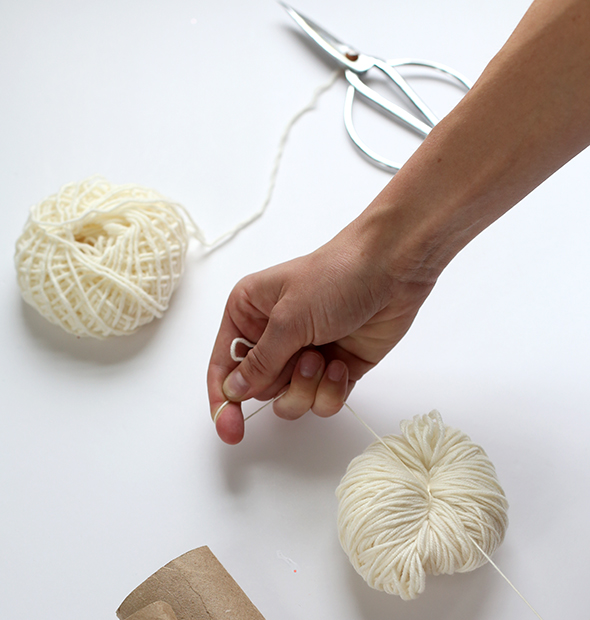
STEP 5: Now tie even tighter with the rolls out. Make a knot. But leave the long strings, don’t snip them. You’ll need them to tie the pom pom to the rug mat.

STEP 6: Now with your scissors snip through the loops around the whole pom pom.
You’ll also need to trim until they’re about the same length.
But don’t get too OCD about it.
You could sit there snipping forever if you wanted.
STEP 7: Now keep going! Each pom pom took us about 5 minutes so put on a movie or two and relax!

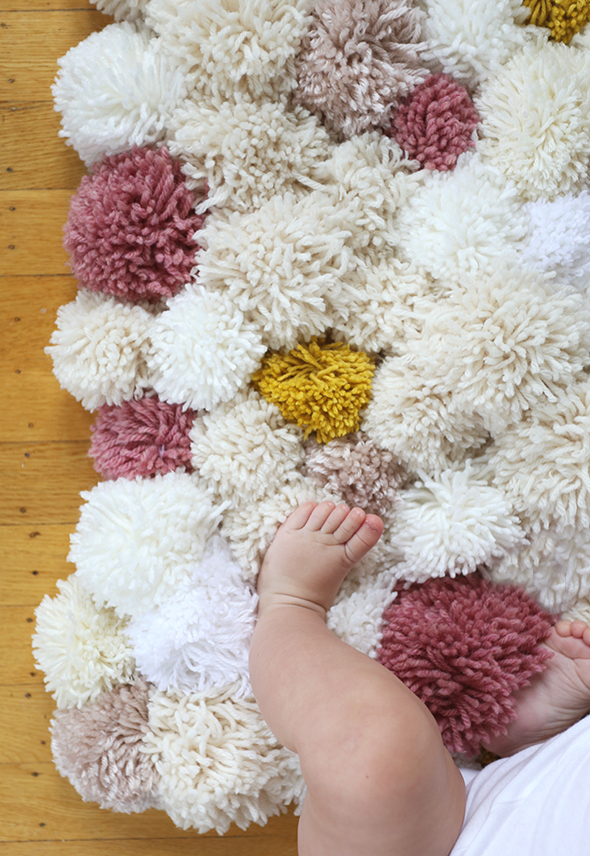
STEP 8: Now you’ll start to place them on the non stop mat to decide on what design you want.
You need them to be really squished together so after placing them you might find out you need to make more.
We needed about 50 for our rug, which was pretty small.
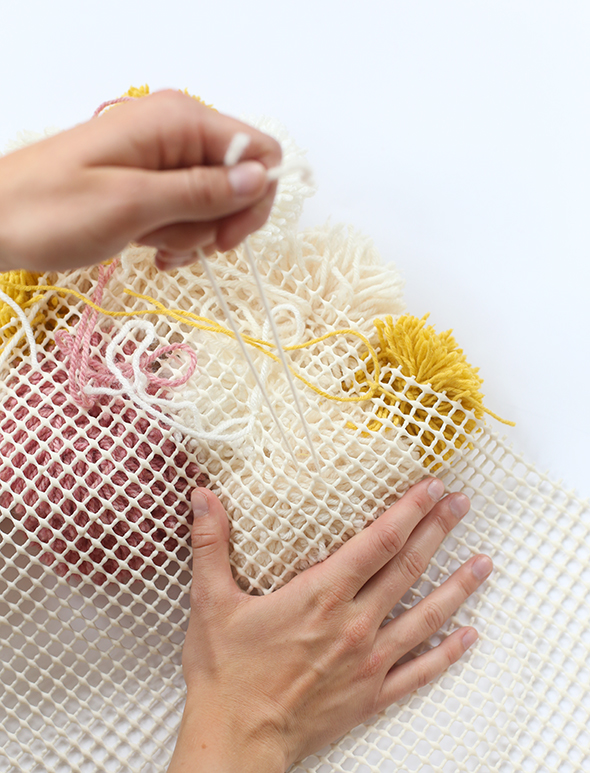
STEP 9: Tie them on using the long string you’ve left hanging (you did leave those strings, didn’t you??? Oh good).
We used slip knots so that we could move them around if we decided we needed to. Or if we got sick of the rug and wanted to use the pom poms for another project.
That’s it!
Supplies: Wool yarn of various sizes, textures, colors of your choosing. Two toilet paper rolls. Scissors. Non stick rug mat in the size you want your rug to be (we bought ours larger and then cut it down). FIRST THE POM POMS: Step 1: Stick your fingers into the rolls and start wrapping the yarn around both. Step 2: Keep going until it looks about this size or even larger. Our rolls were so squished because they had been used a lot but yours might not get as squished at first. The sizes will differ but that’s okay! We liked the look of the rug to have different size pom poms. Step 3: Cut another piece of string and weave it through both of the rolls so it wraps around the whole thing. Step 4: Tie once, then pull the rolls out Step 5: Now tie even tighter with the rolls out. Make a knot. But leave the long strings, don’t snip them. You’ll need them to tie the pom pom to the rug mat. Step 6: Now with your scissors snip through the loops around the whole pom pom. You’ll also need to trim until they’re about the same length. But don’t get too OCD about it. You could sit there snipping forever if you wanted. Step 7: Now keep going! Each pom pom took us about 5 minutes so put on a movie or two and relax! NOW TO MAKE THE MAT Step 8: Now you’ll start to place them on the non stop mat to decide on what design you want. You need them to be really squished together so after placing them you might find out you need to make more. We needed about 50 for our rug, which was pretty small. Step 9: Tie them on using the long string you’ve left hanging. We used slip knots so that we could move them around if we decided we needed to. Or if we got sick of the rug and wanted to use the pom poms for another project. DIY Easy Pom Pom Rug