By craft contributor Caitlin
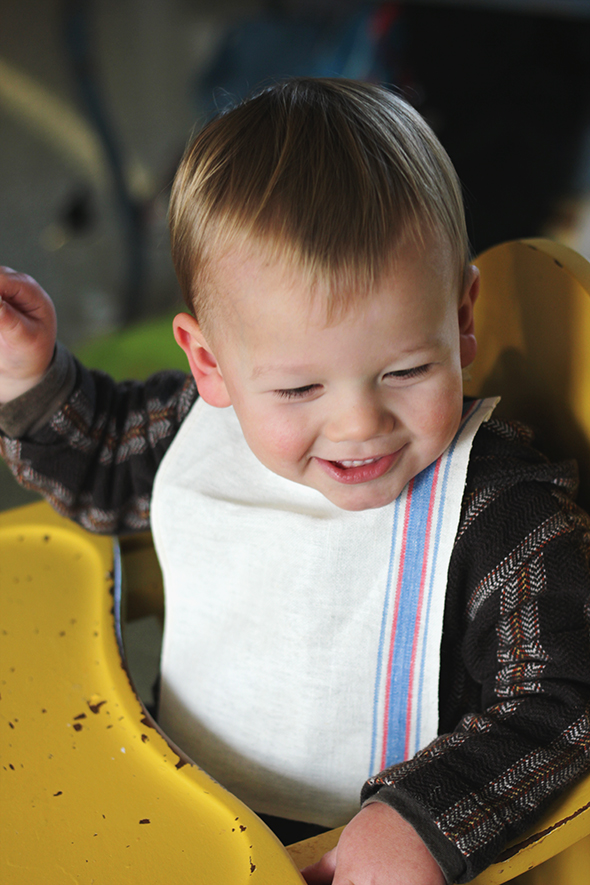
 I pick up vintage linens whenever I can find them for decent prices at estate sales and thrift shops. Over the years I’ve come up with quite the collection! They look beautiful just hanging in the kitchen but from time to time it’s fun to use them for a sewing project. And this one is just too sweet. With some simple sewing you can make an adorable bib for a little lad or lady!

Keep reading to see how to make it!
What you need:
-Linen. You can find some affordable striped kitchen towels at IKEA if you’re not the thrifting type.
-Iron
-Scissors
-Sewing Machine
-Pencil
-Pins
How to make it:
-Cut out a piece of linen 8.5″ x 11″. (Or larger depending on the child you are making it for)

-Lay the linen face down and fold the bottom up 1/4″ and iron and then fold up again and iron in place.

-Sew a straight stitch across the bottom.
-Repeat the last two steps with each of the two sides of the bib (Leave top unfinished at this point.)
-Fold 1/2″ of top down twice and iron in place.

-Fold bib in half and draw rounded line for the neck (should go right over the folded seam) and cut along line.

-Straight stitch across each of the top pieces.
-Cut out a piece of linen 20″ long, 2″ wide. (You could also use double biased tape at this point if you prefer.)

-Fold both sides in to meet in the middle and iron in place.

-Now fold that in half and iron in place.
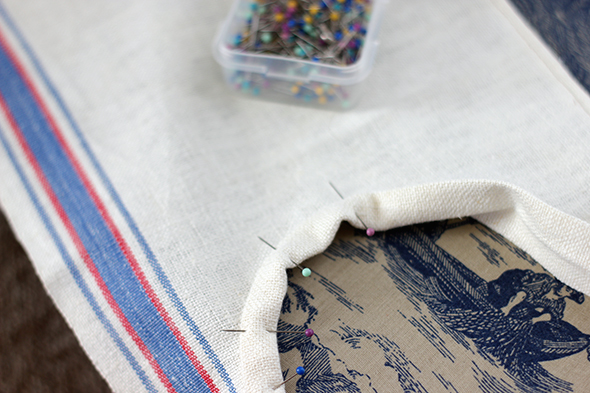
-Pin middle to the middle of the bib. The bib should be in between the two layers.
-Sew along the entire length of the fabric, staying close to the edge.
-Remove pins and trim any excess threads.