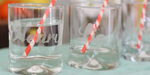
 For a family of three, we produce a whole lot more dirty glasses in any given day than seems humanly possible. I thought etching our names in glasses would be a great way to reduce washing and make table setting more entertaining with Henry. I was a little scared of etching but it was easier than I thought and really fun. Wouldn’t it be a sweet wedding gift to give the bride and groom a set of etched wine glasses?


 Would you like to see how to make your own? Keep reading to see the full tutorial…
 Etching powder. Its a little scary and requires using rubber gloves since it’s highly toxic if it comes in contact with skin. Cheap though, I bought my bottle from amazon right here
 for $6
 I wanted it to be script (which is also better for stencils) so printed out some script names. You could also use a stencil, or if you have a fancy stencil cutting machine like a cricut, that would be perfect and save you a lot of time and do you live in SF? Please can I borrow it sometime xoxo
 I don’t have any fancy stencil cutting machines, so I simply taped the printed names onto clear contact paper and spent some quality time with my exacto knife.
 After sticking the contact sheet stencils onto the glasses, I carefully applied the etching cream with a paint brush. Dabbing it on very generously. Wearing rubber gloves so I wouldn’t have to call poison control.
 After a few minutes (check your bottle’s instructions) you can just wash it off and tear off the contact sheet.
 Voila! Wash them in a hot dishwasher cycle before using.