This is a holiday DIY series showcasing 10 different ways to decorate a glass ornament. I’ll be featuring one tutorial every day this week and then the real treat is I have five of my favorite crafty bloggers lined up to share their ideas each day next week.
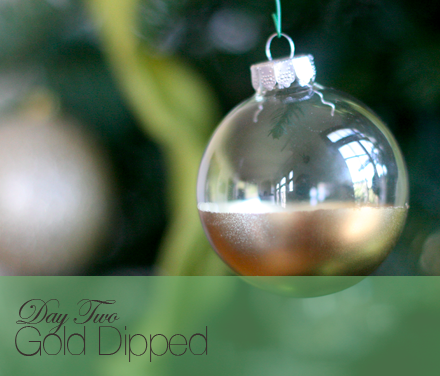
Today I’m showing you how to make this pretty gold dipped glass ornament. If you’ve seen my gold toe flats tutorial, this process may look a bit familiar by now:
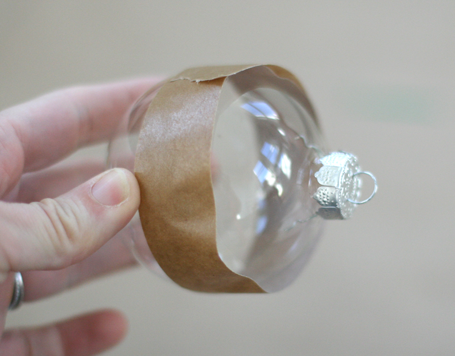
Tape around your glass ornament pressing one edge carefully along the ornament. The pressed edge will be where your gold paint will start. Keep the other edge of the tape loose as shown above.
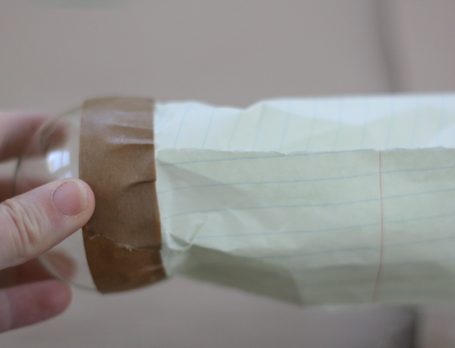
On the opposite of the pressed edge, stick a few pieces of paper up against the loose tape to cover and protect the rest of the ornament from the spray paint

Before spraying, carefully run your fingers along the edge where the tape hits the glass again to make sure there are no bumps or holes which will result in an uneven paint line.

Spray with gold spray paint in a well ventilated area and using paper or cardboard beneath to protect your floor
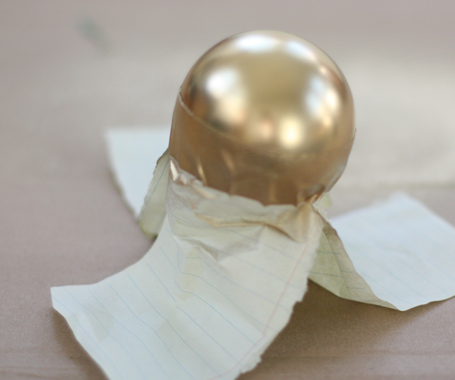
The strips of paper worked as a perfect ‘stand’ while the paint was drying. Then, when dry (at least 4 hours) go ahead and tear off the paint and paper and hang on your tree!
In case you missed it:
Day One: A Christmas Scene