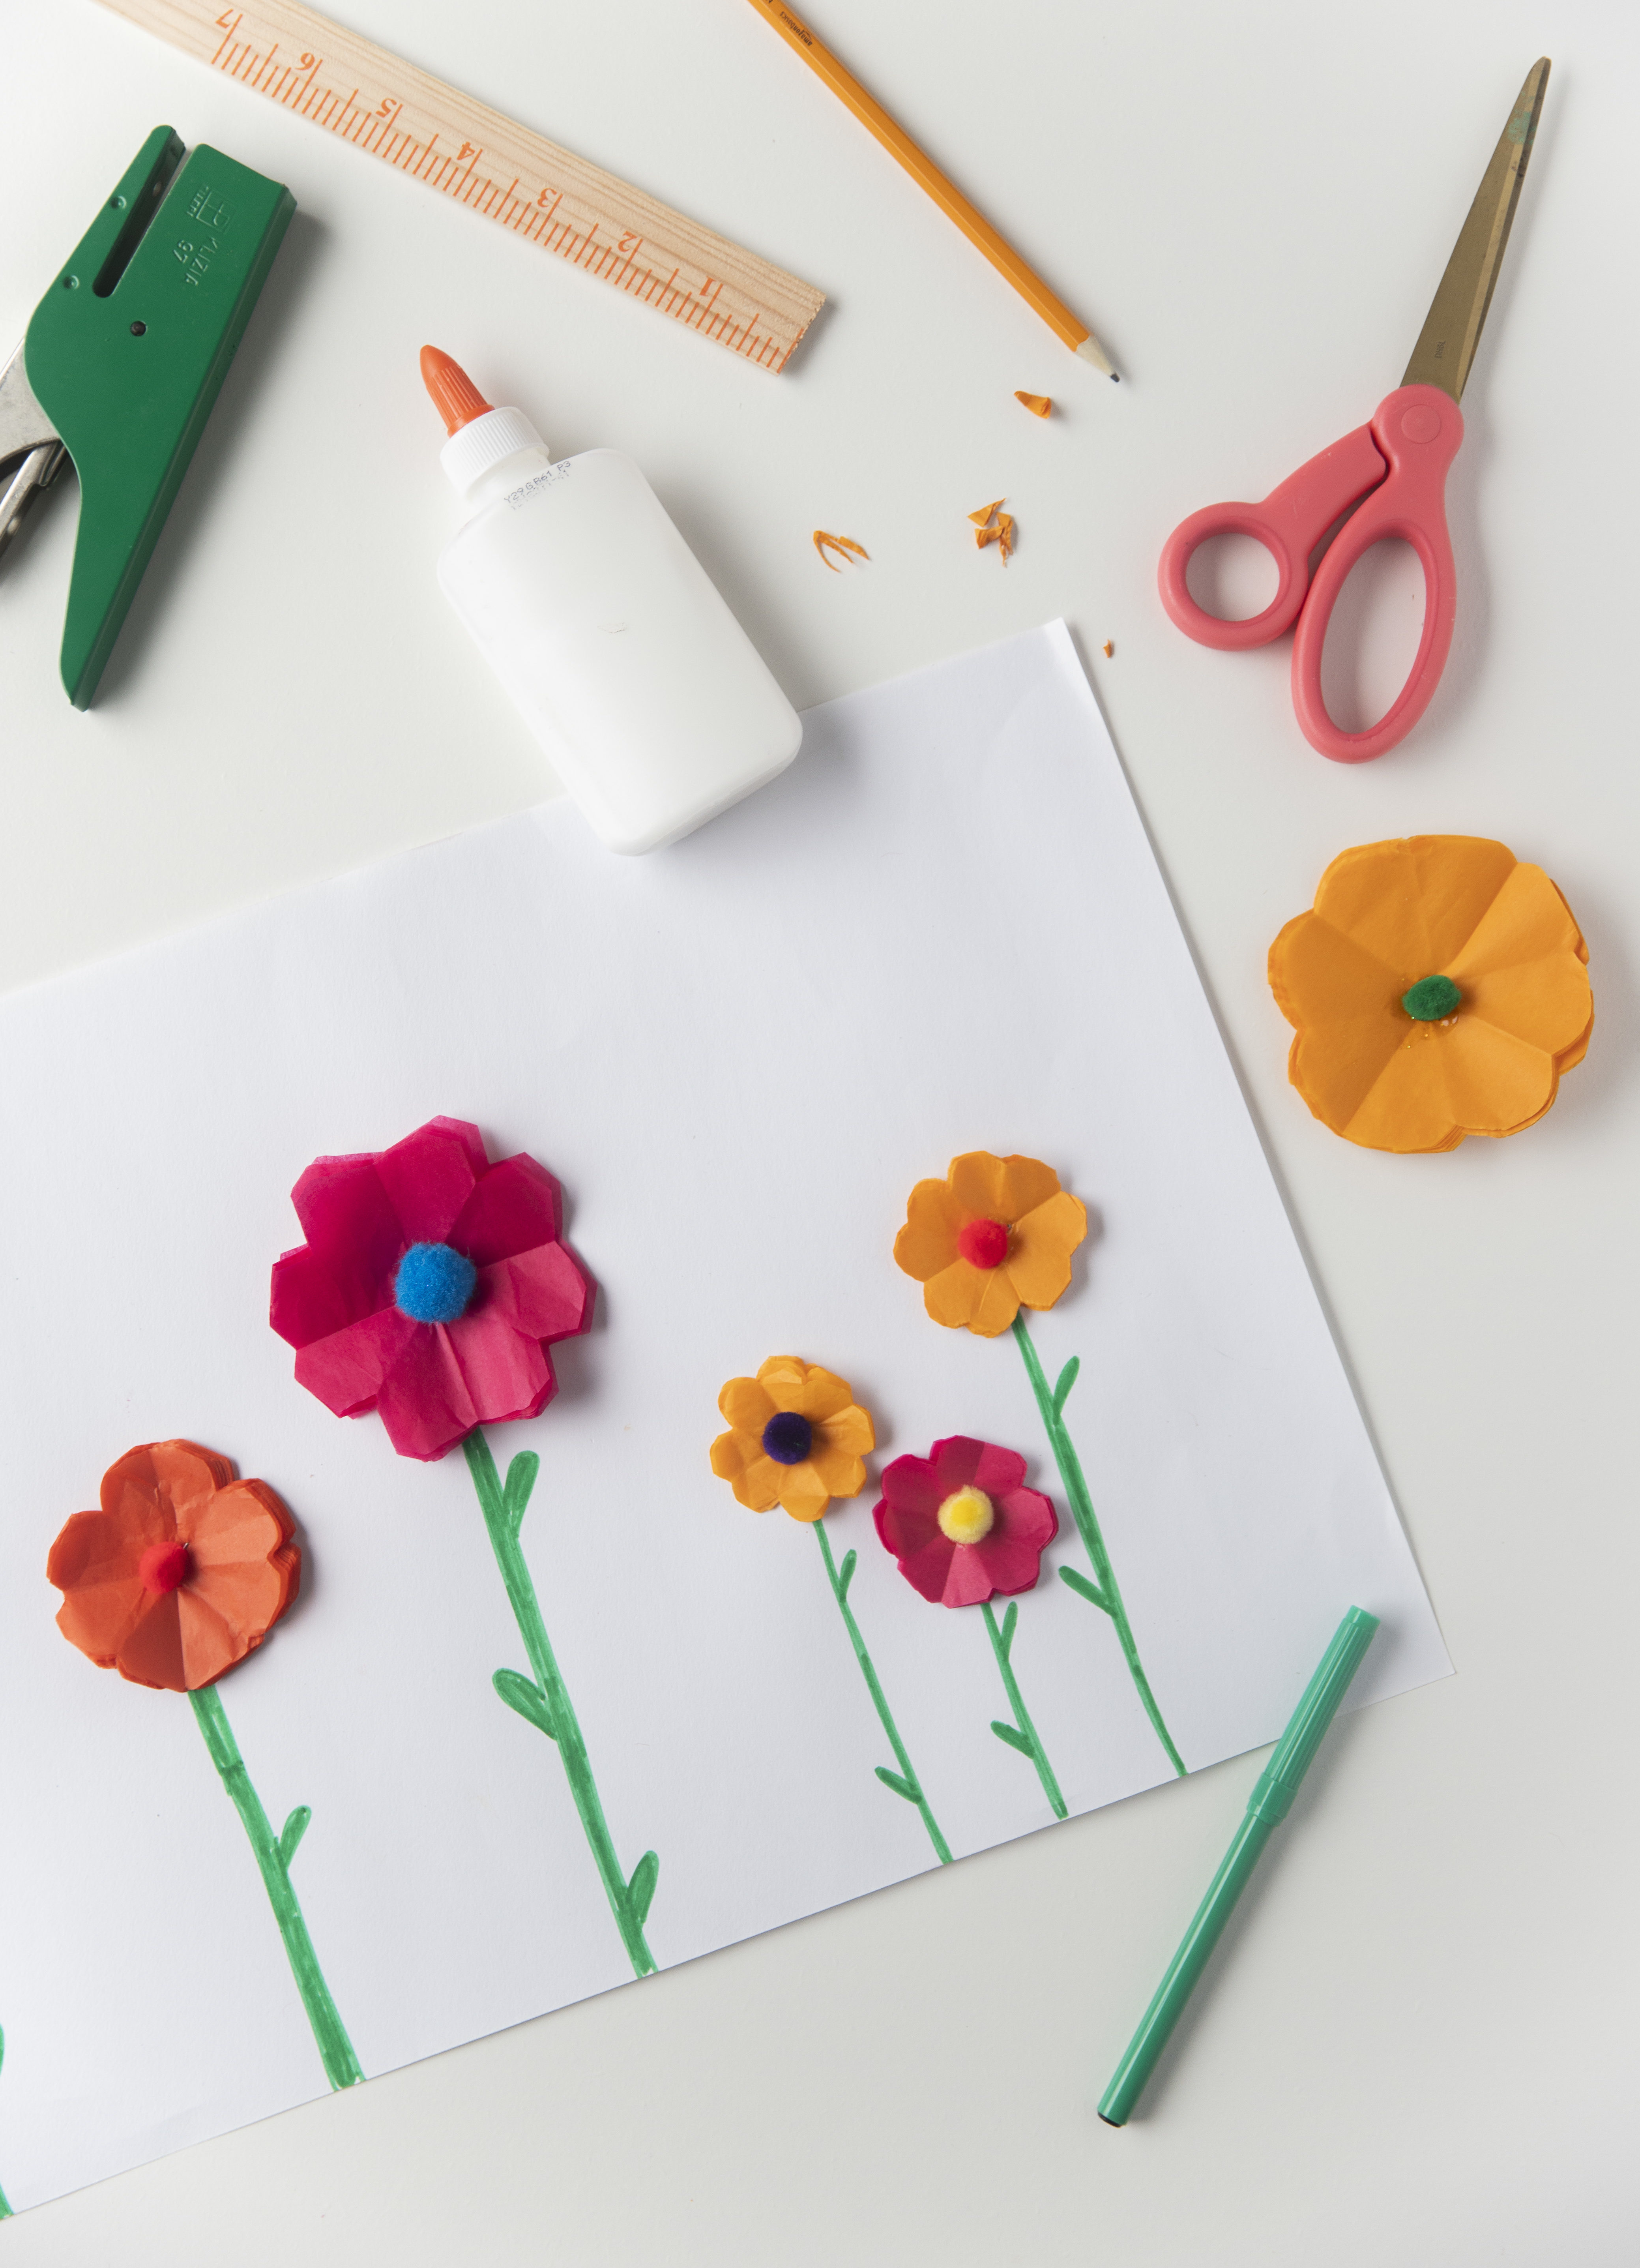
Thought we’d start sharing some of the art projects we’ve been teaching in our Art with Edie class on IGTV every Thursday. This past week we made a pretty spring scene using tissue paper flower art. A great project to do with kids at home. Here’s how to make them yourself…
How to Make Tissue Paper Flower Art with Kids
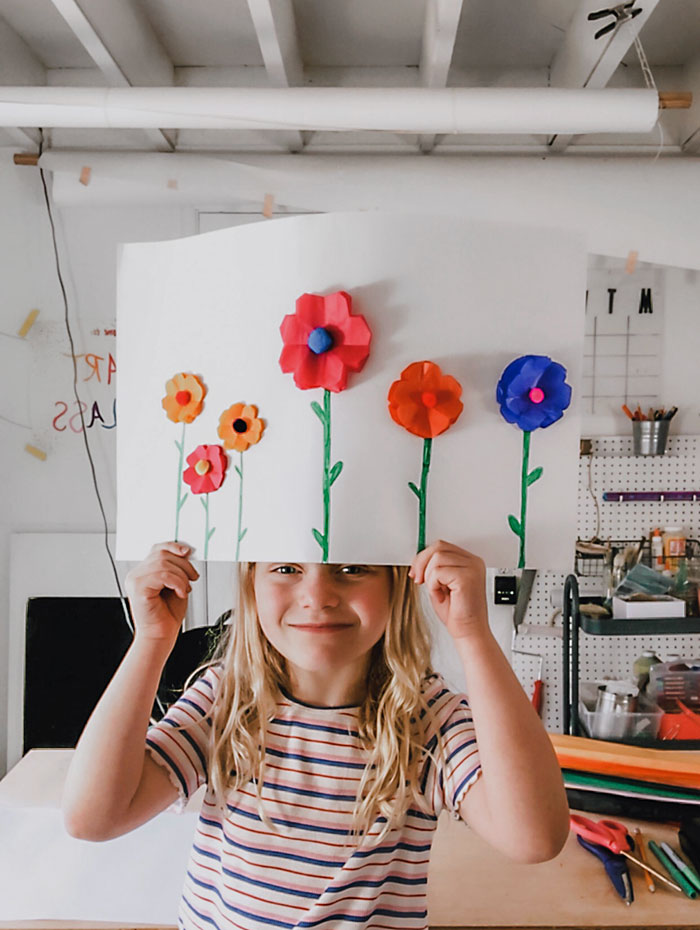
Every week on IGTV, my 6 yr old Edie and I host an Art with Edie class. Have you had a chance to join us? It’s live on IG every Thursday at 1pm PST, and then we upload it to IGTV immediately after. We’ve made some watercolor planets, paper mache bowls, sunset collages, and color wheel pantings.
Edie told me recently it’s her favorite thing we do together, and I agree! It’s been a really sweet silver lining during this shelter in place.
Kid Crafts While Staying At Home
We also rounded up a list of 30+ crafts and activities to do with your kids right here. We’re all about exploratory art (nothing too quick!), and big/messy/oversized ideas with lots of room for creativity and adapting to different ages and interests. Would love to hear your ideas too!
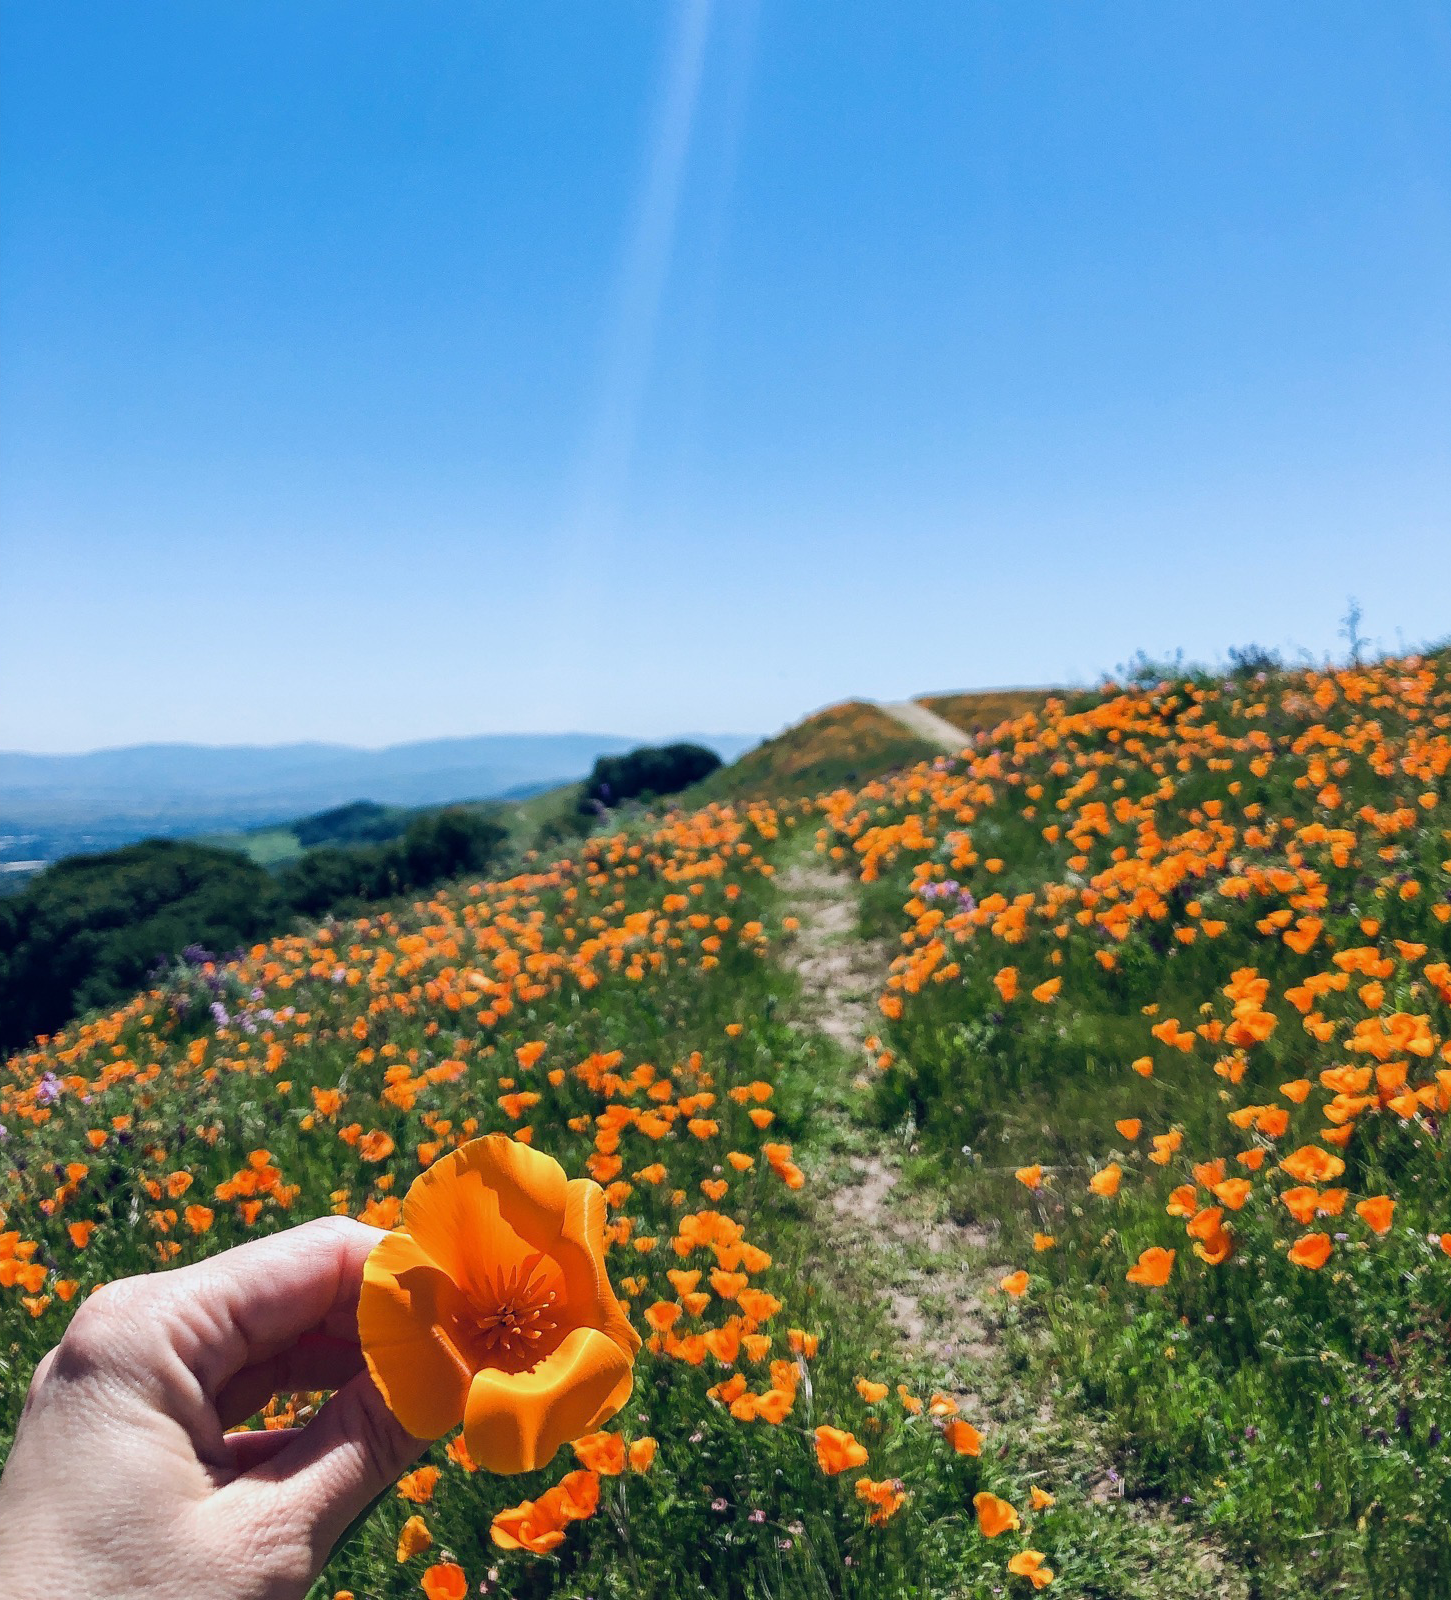
Inspired by my hike to see the poppies here in the Easy Bay Hills a couple weeks ago, I decided to make a spring scene with tissue paper flowers. I like to think of them as poppies, but I’m not going to be too picky here- you’re in charge of what flower scene you make! It’s a great project to do with kids, but you might have to do one of the cuts at the end for them FYI!
Supplies for Making the Flowers
- paper
- tissue paper in pretty spring colors
- scissors
- pencil
- stapler
- pom pom or other decor item for center of flower
- glue
- marker

How to Make the Tissue Paper Flowers
Step 1:
Cut a small square with about 8-10 sheets of tissue paper. It doesn’t have to be this size exactly, but this will be about what the finished size will be.
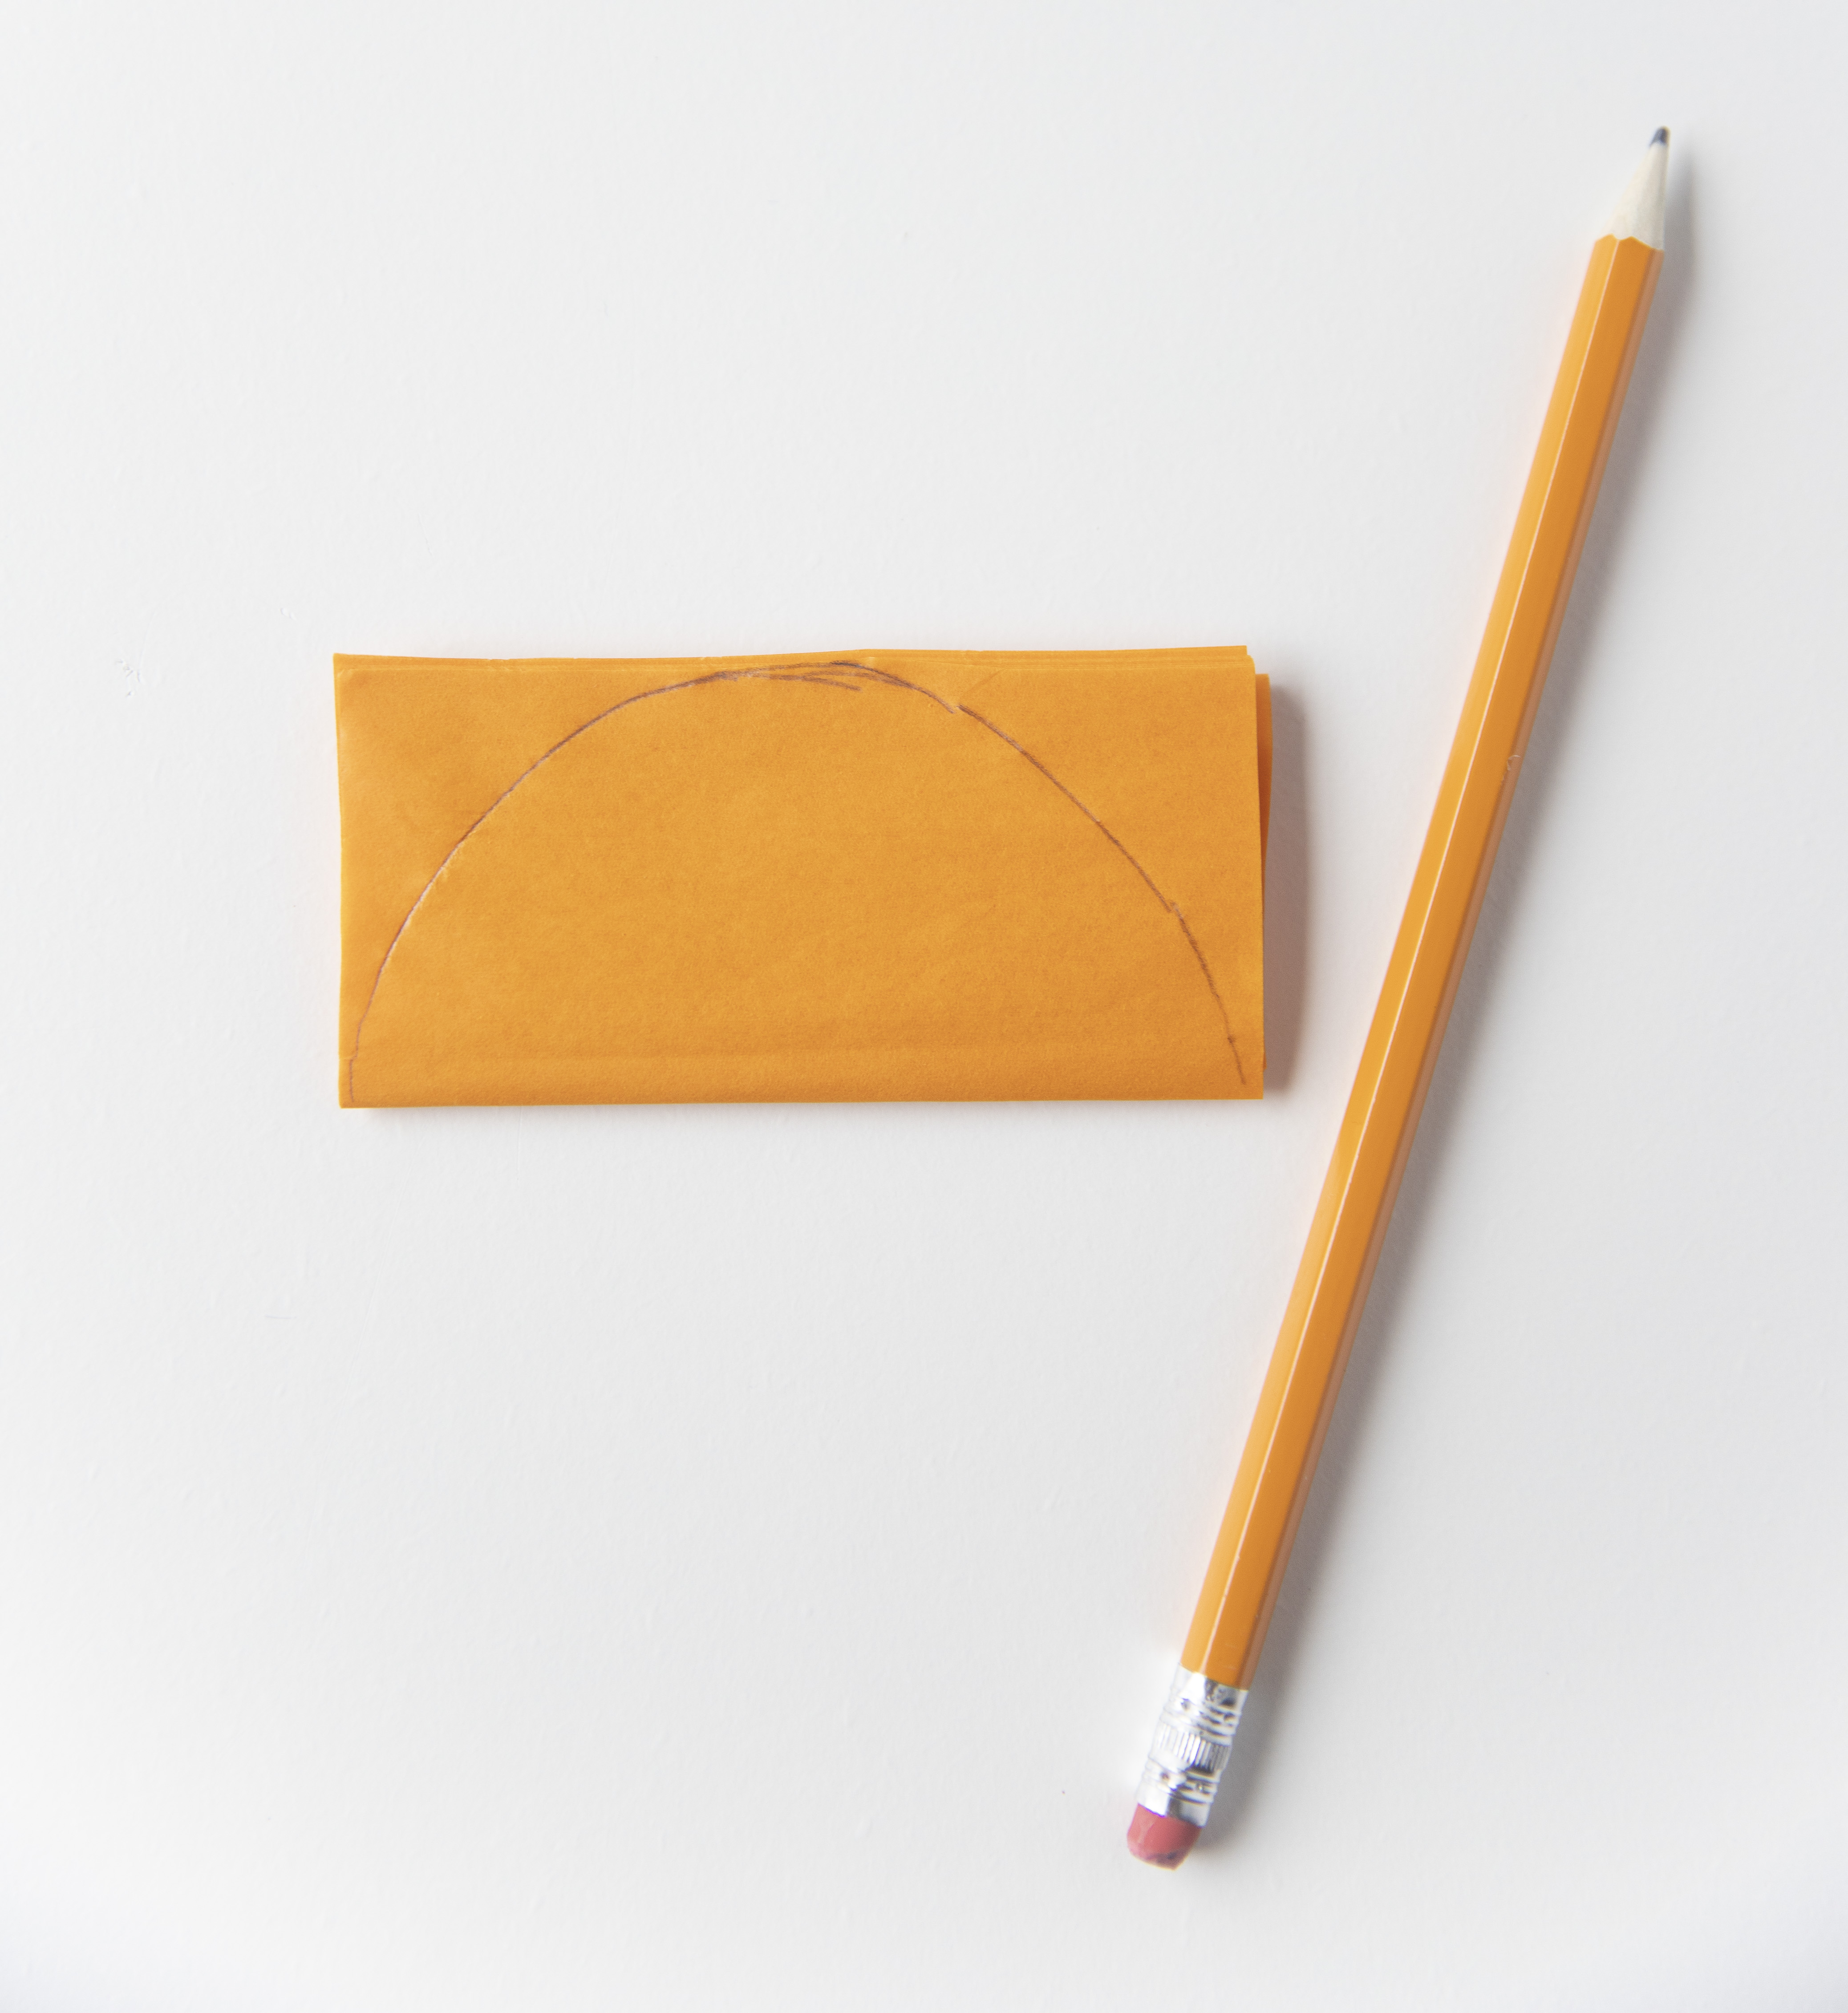
Step 2
Fold the paper in half, and draw a semi-circle (rainbow!) with a pencil. Be sure the folded section of the tissue paper is as the bottom of the rainbow.
Tip: Be sure to start/end the rainbow at the edges, and touch the top
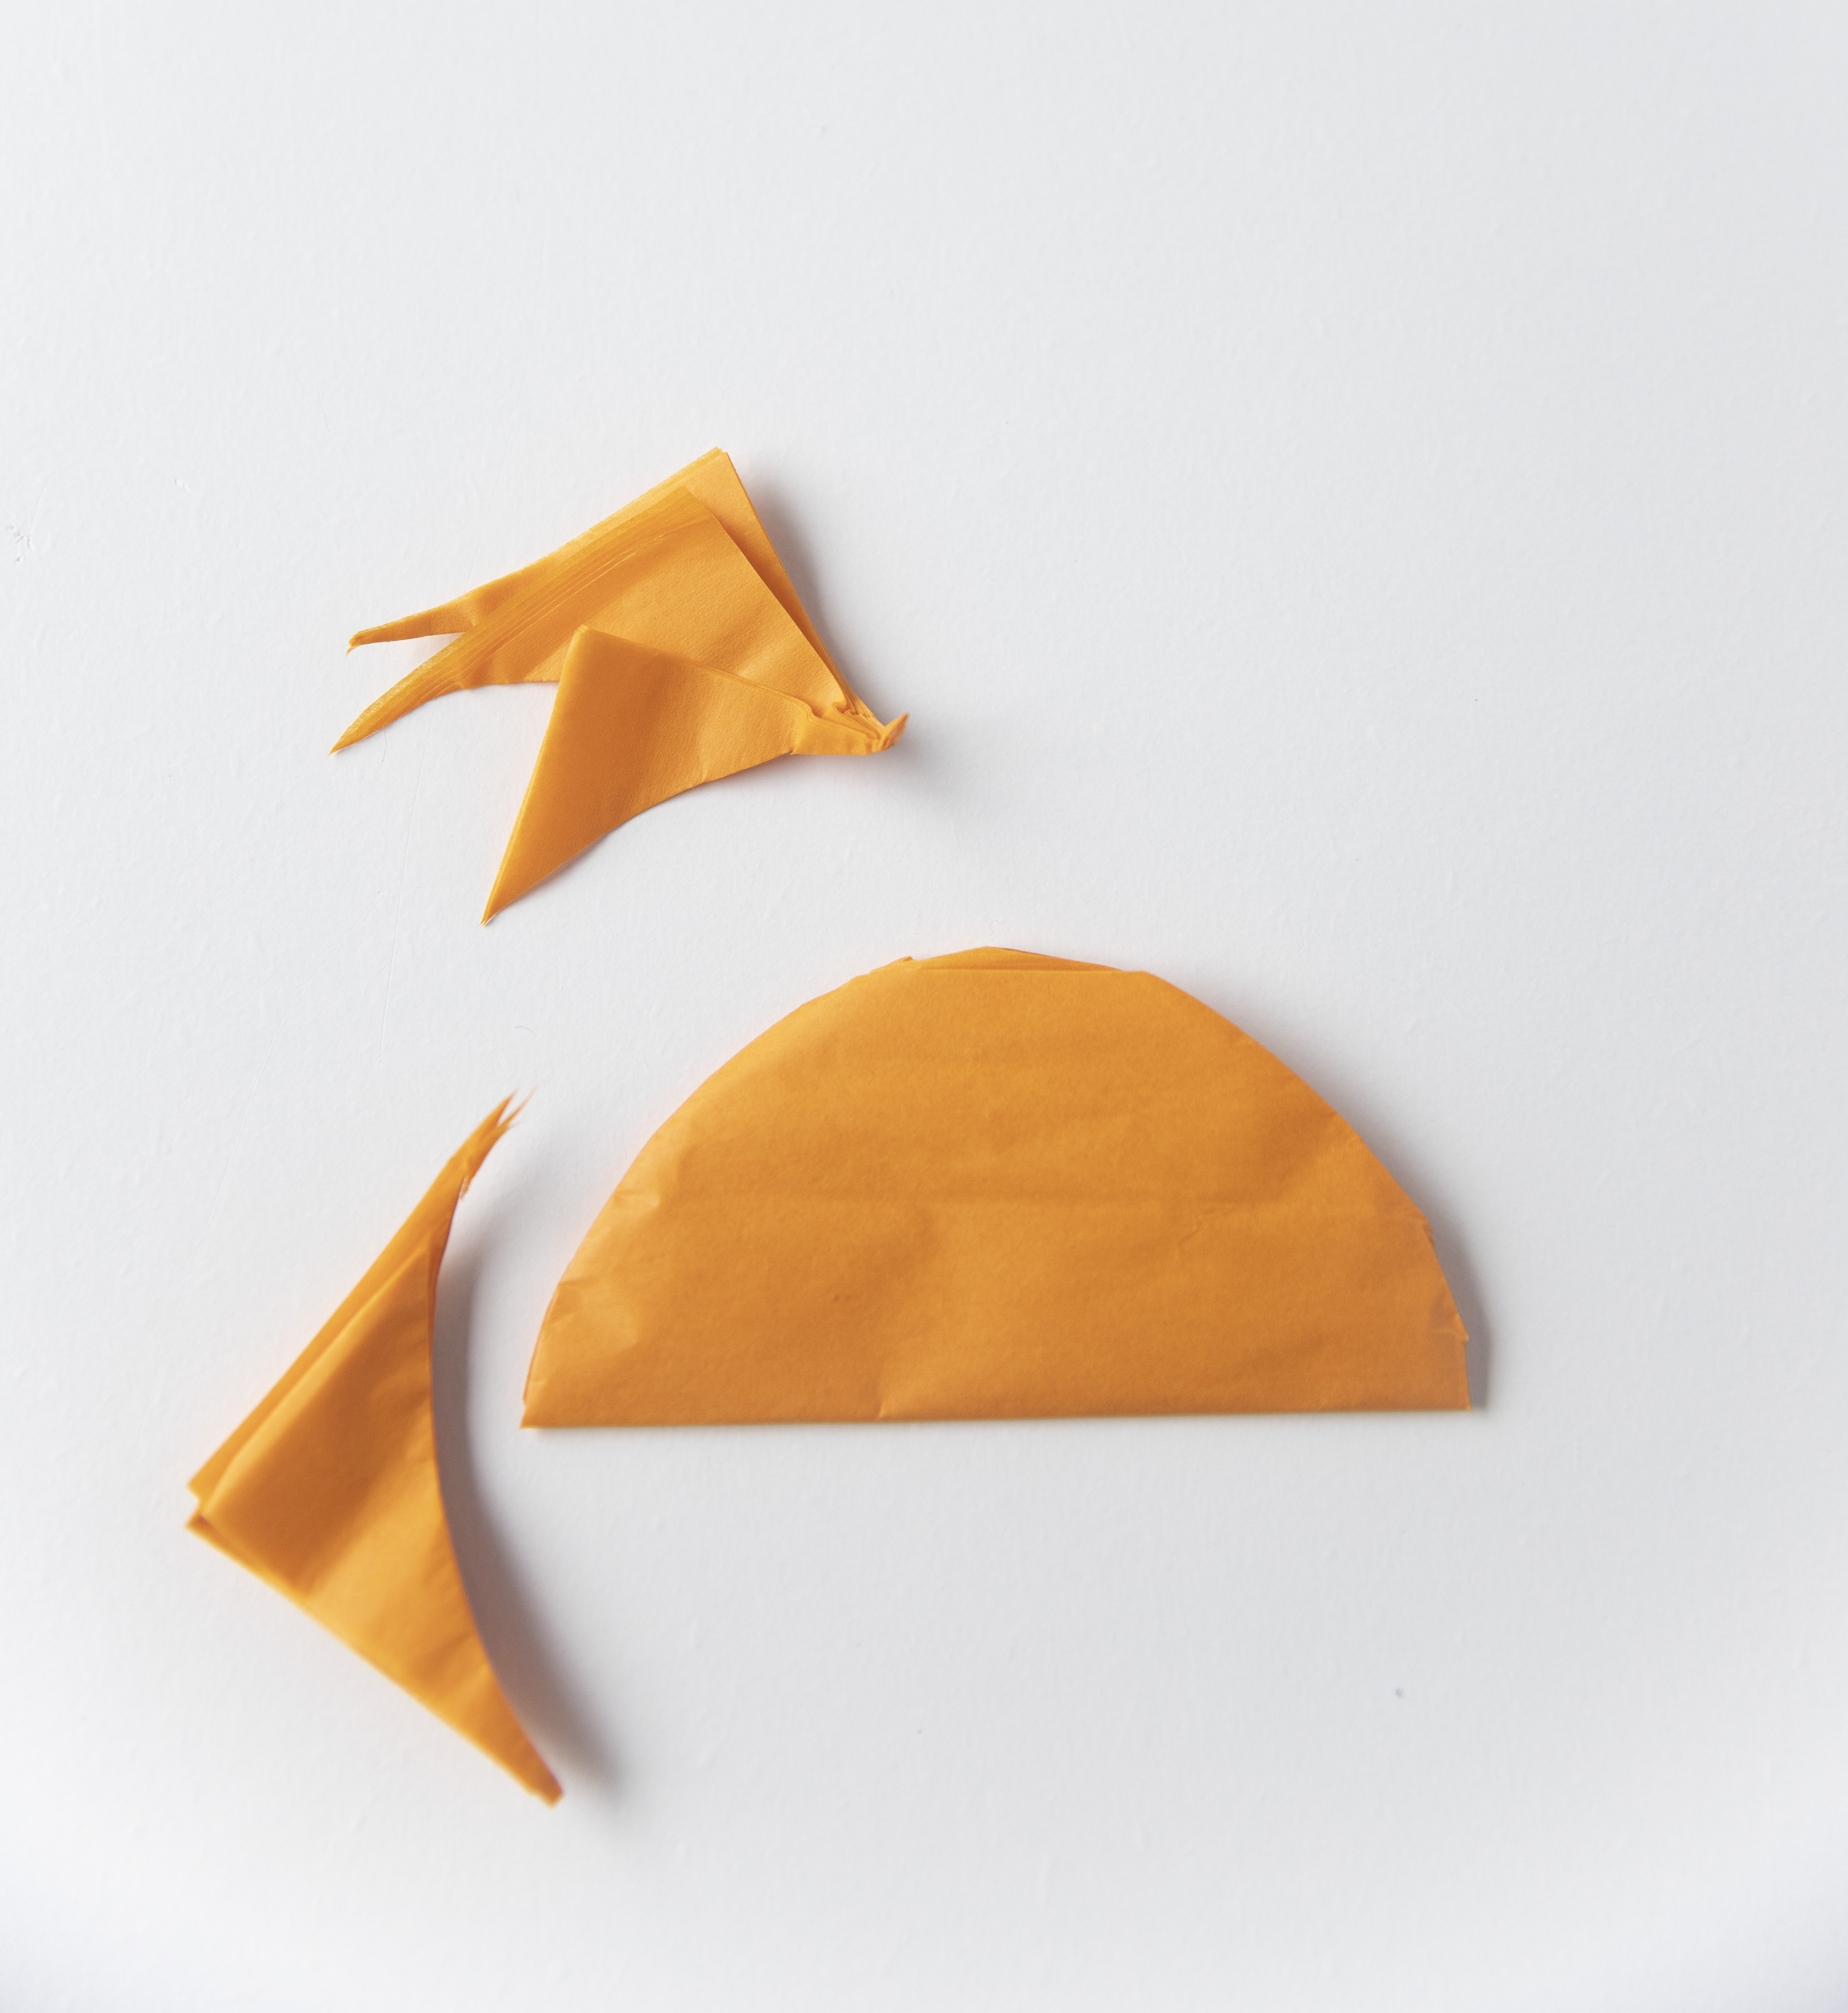
Step 3:
Cut the semi-circle out.
Step 4:
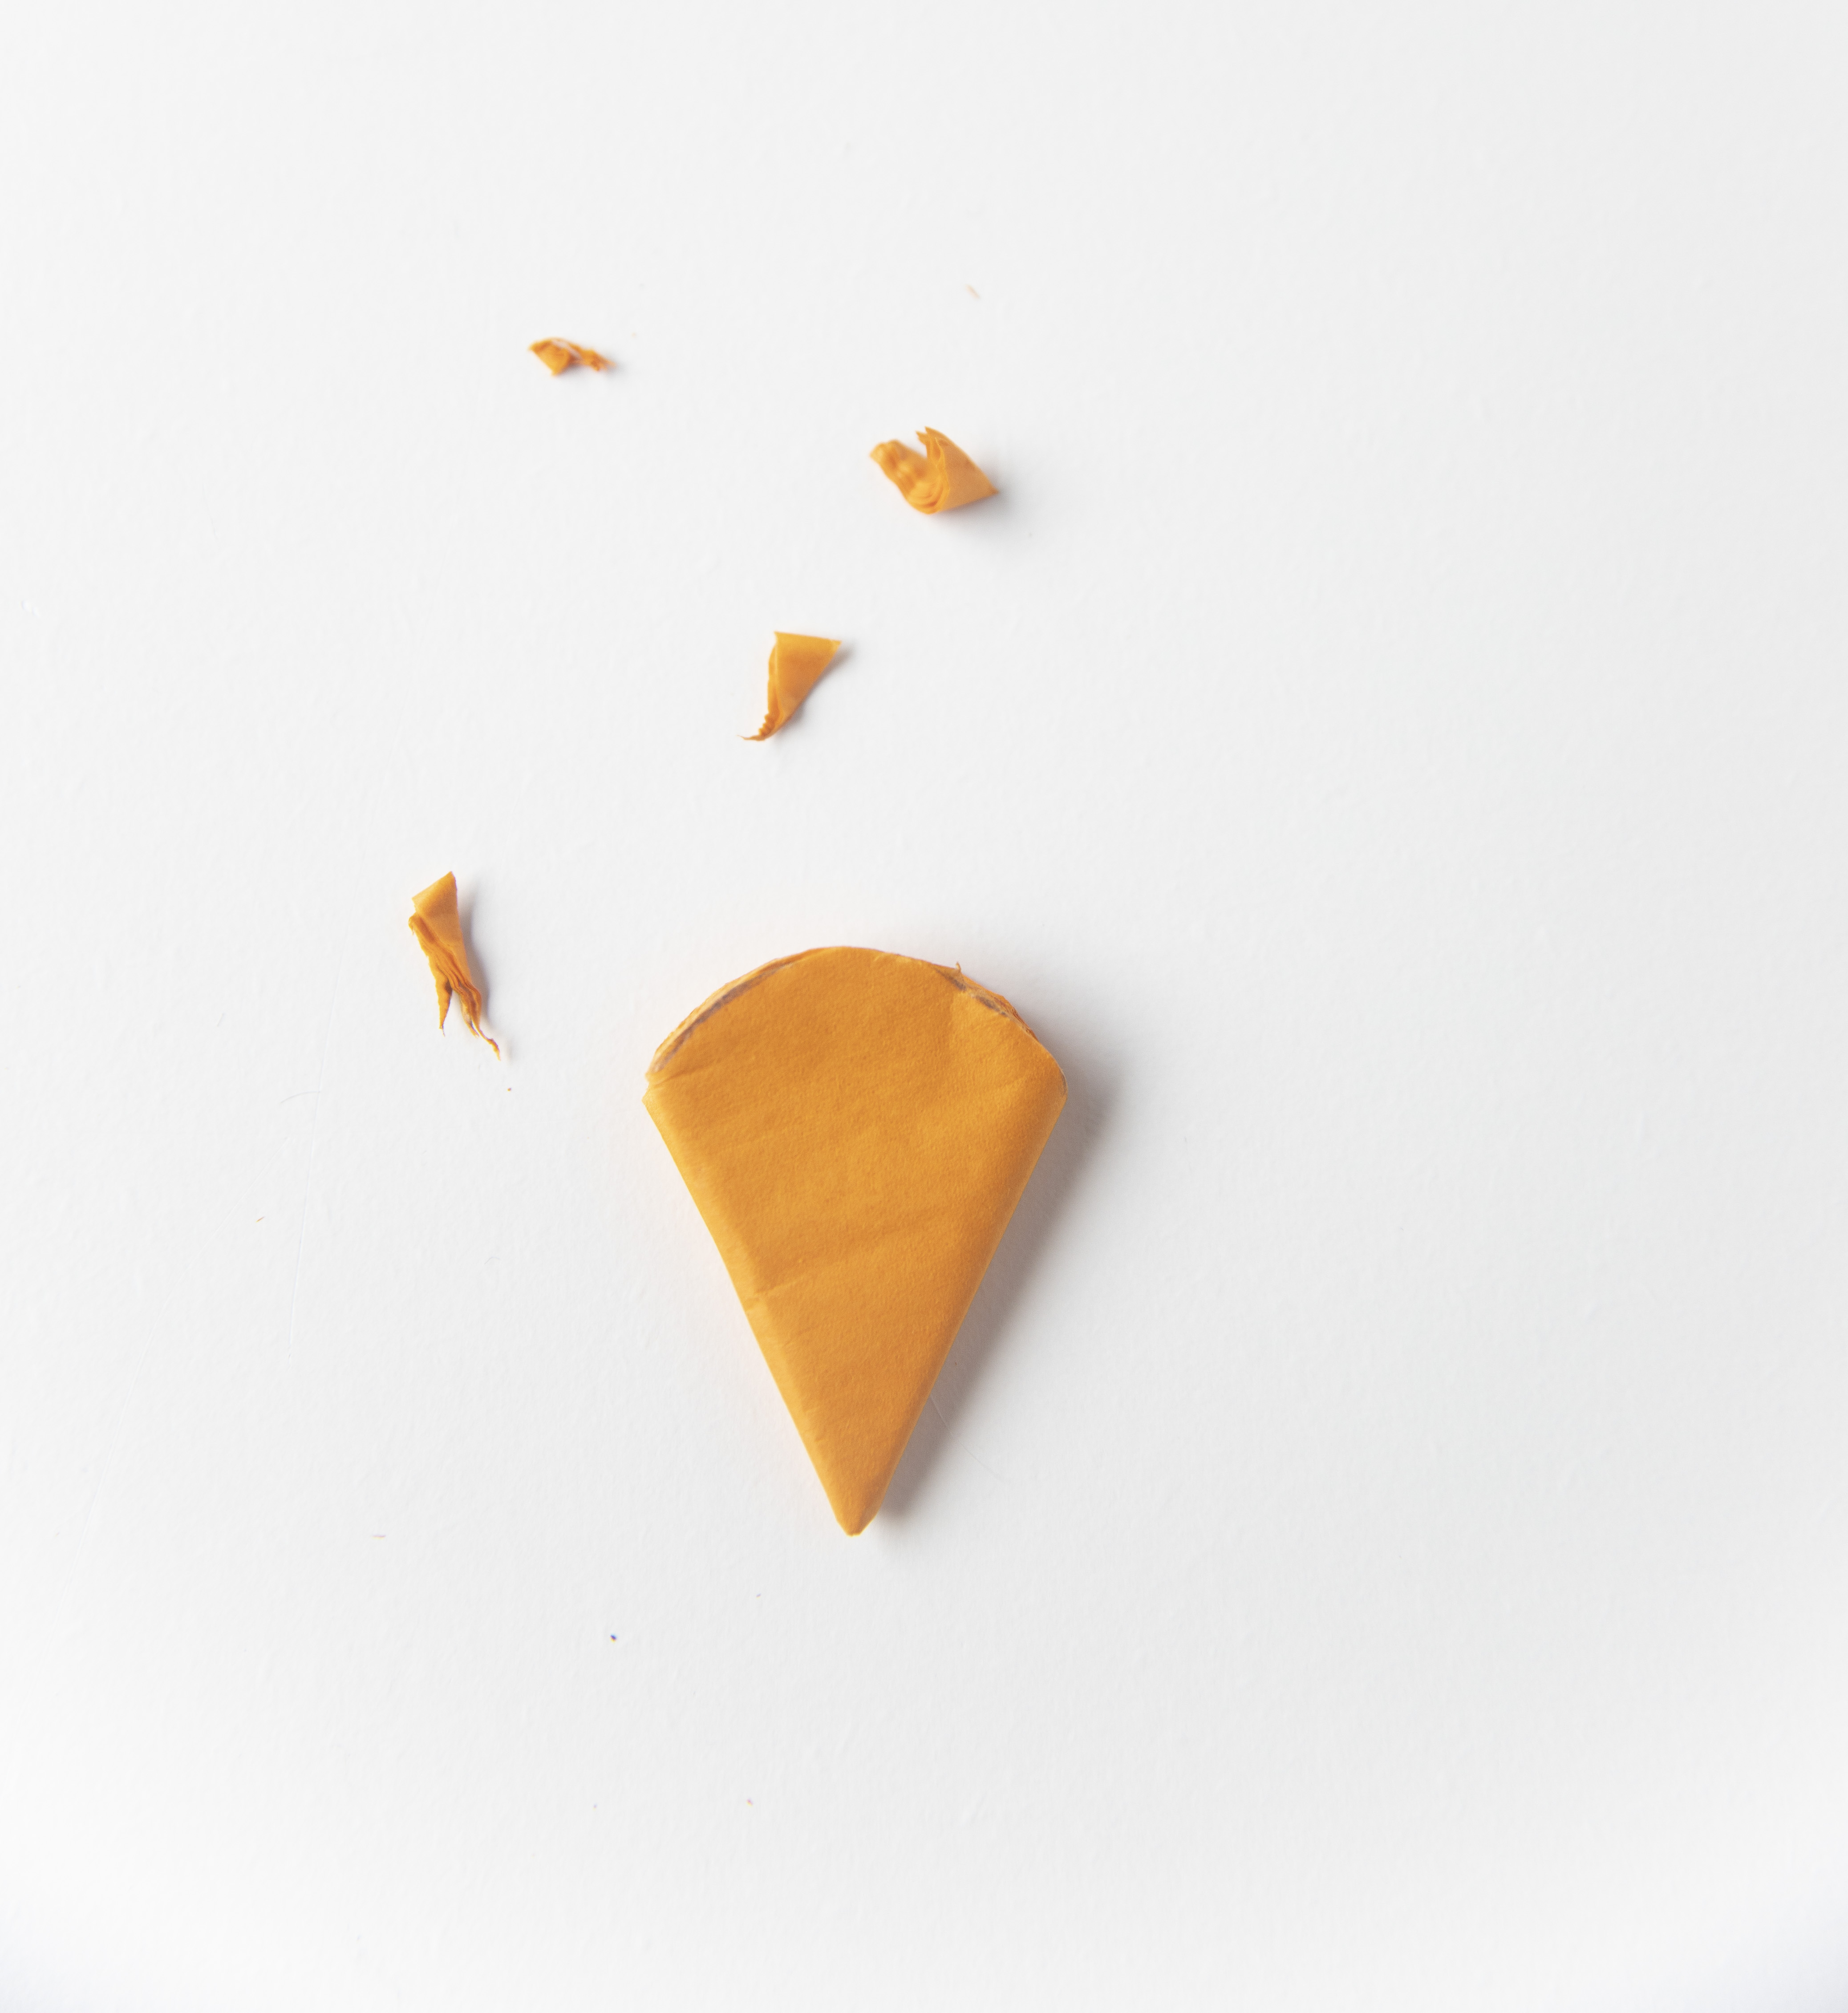
Fold the semi-circle in half matching the end to end to make a big slice of pizza.
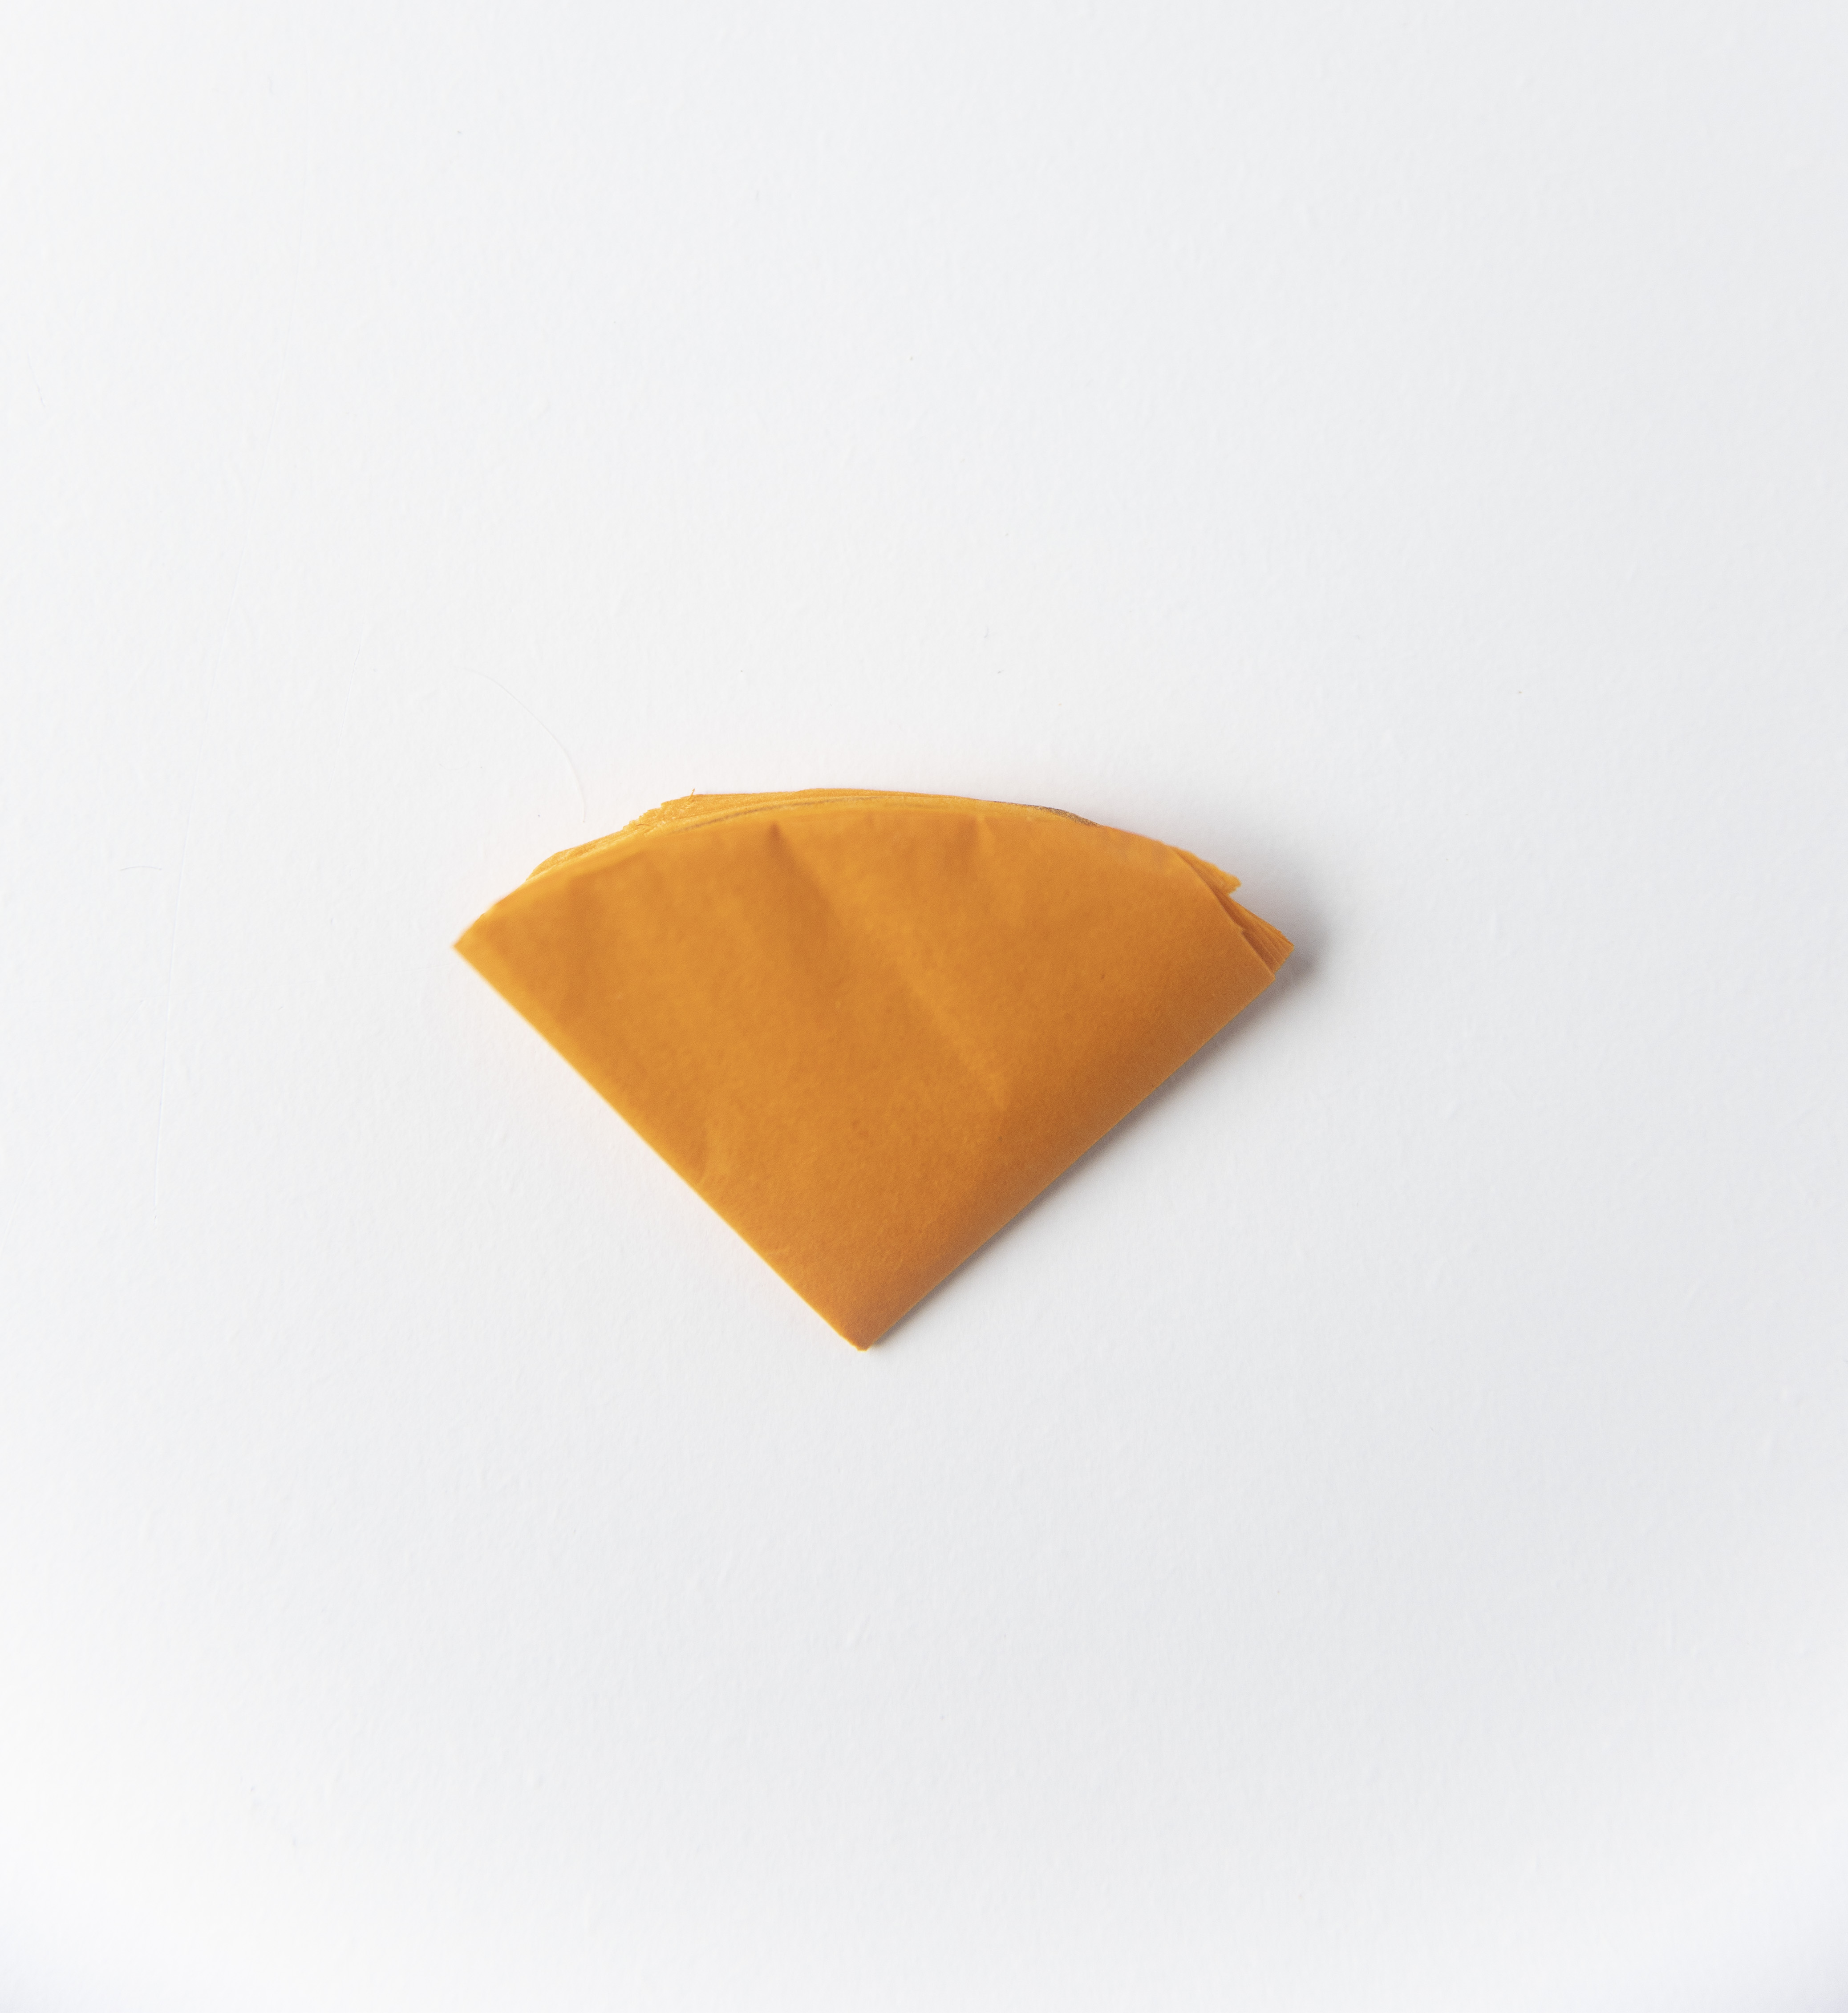
Step 5:
Fold the pizza in half to make an even more narrow piece.
TIP: You can even fold it AGAIN if you wanted more detail in the petals. But it’ll be harder to cut with every fold in step 6!
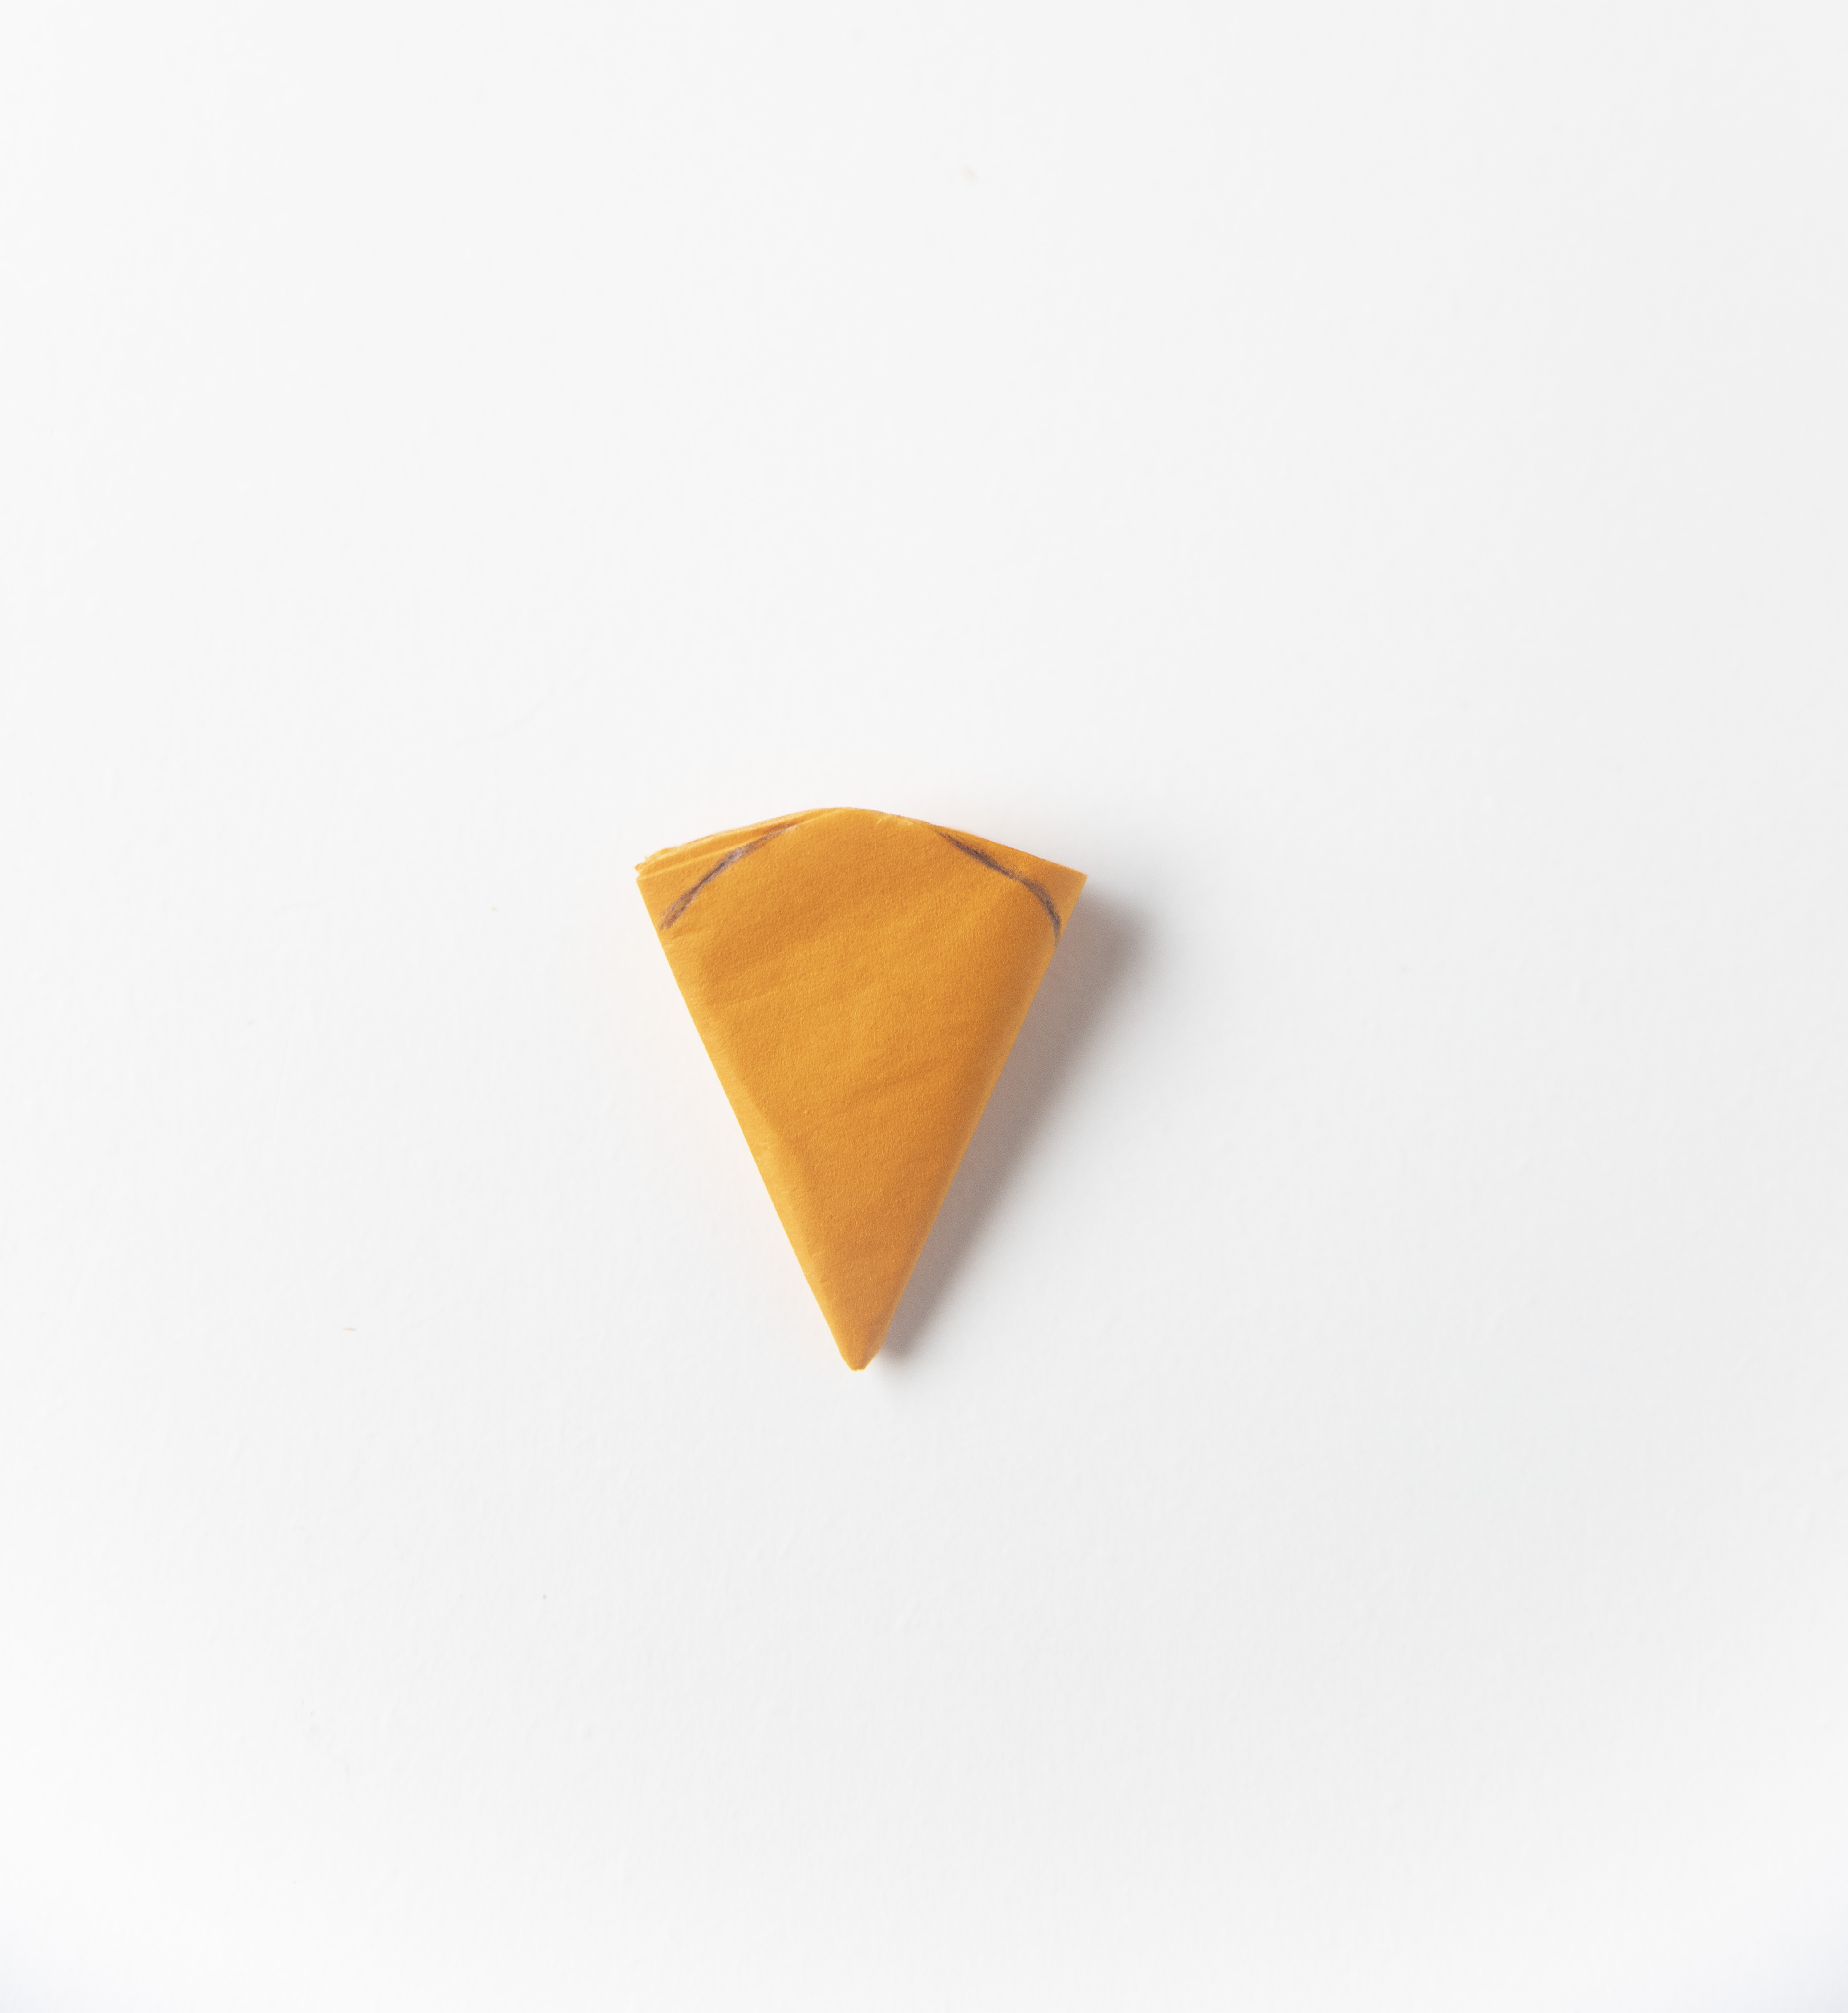
Step 6:
With your pencil, draw a wide rainbow, similar to Step 2
Step 7:
Cut the edges of the rainbow off like you did in Step 3. You’re making an even more rounded piece (like an ice cream cone!). Just don’t get too hungry yet, just a couple more steps to go!
Tip: For kids, they might need help with this cut! Even though tissue paper is thin, it’s a lot of paper to cut through.

Step 8:
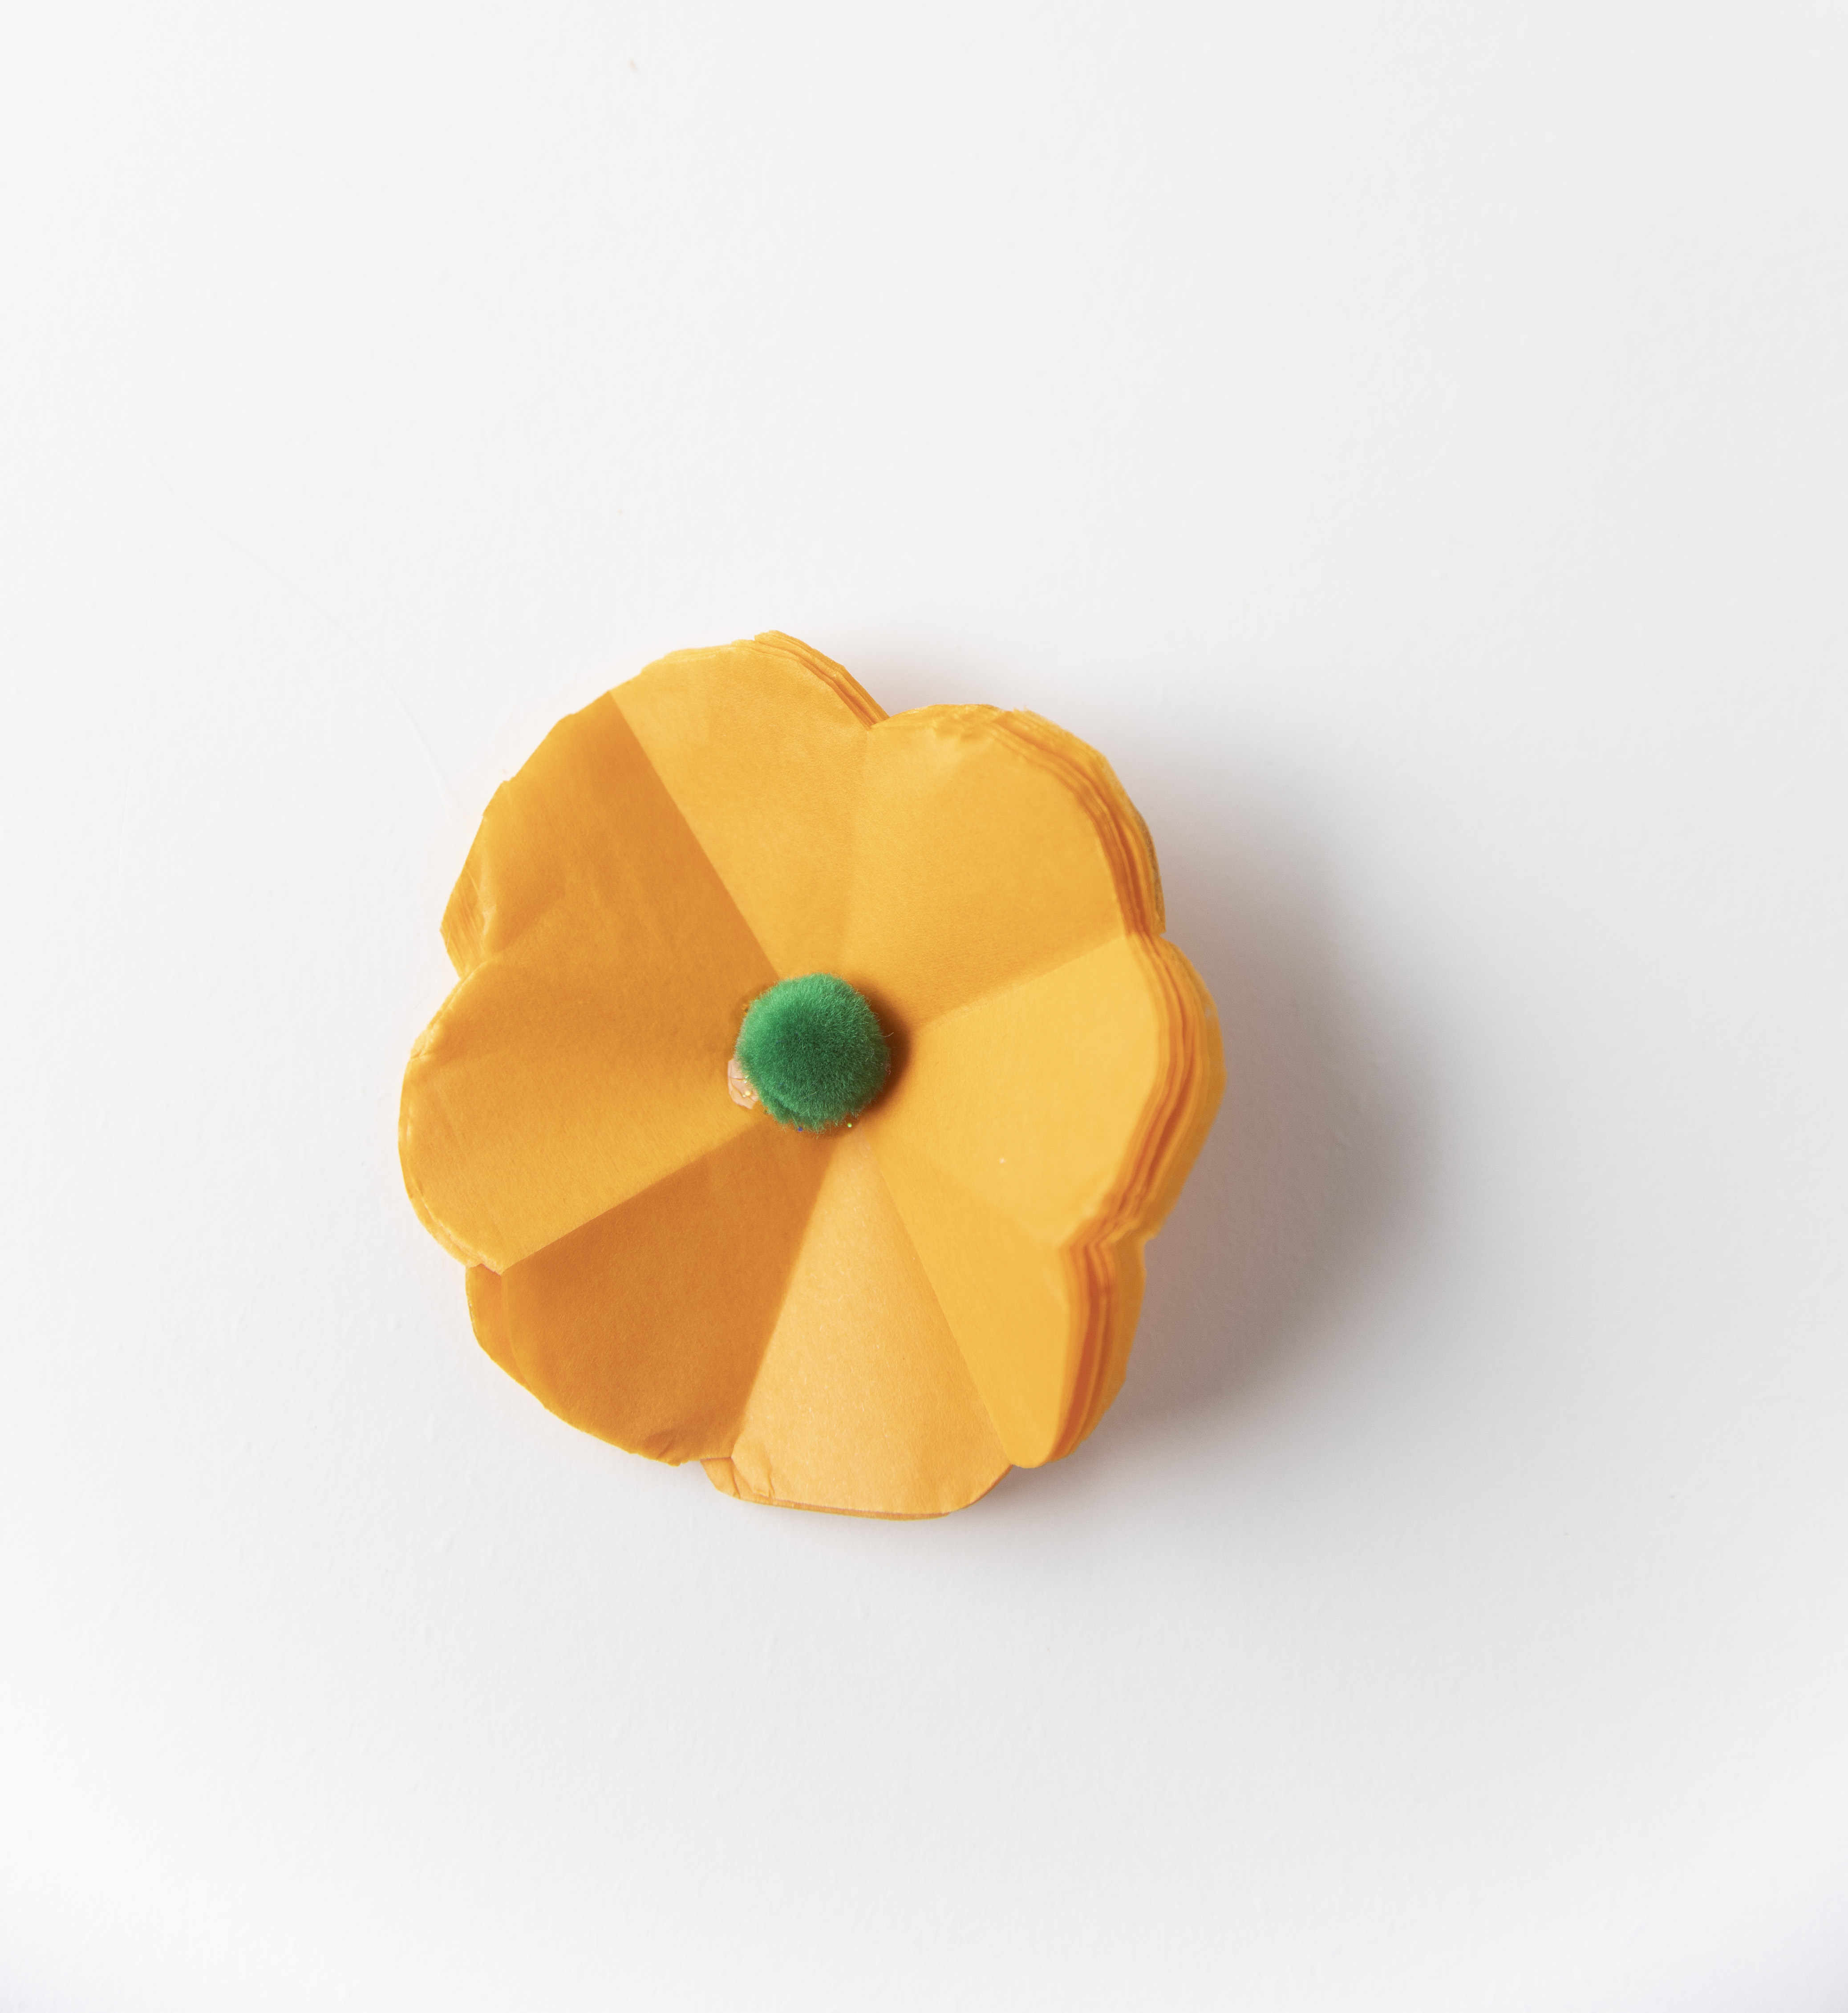
Carefully open it up and try to find that center piece to reveal your pretty flower petals.
Step 9:
Staple right in the middle of your flower to keep all the tissue paper layers together.

Step 10:
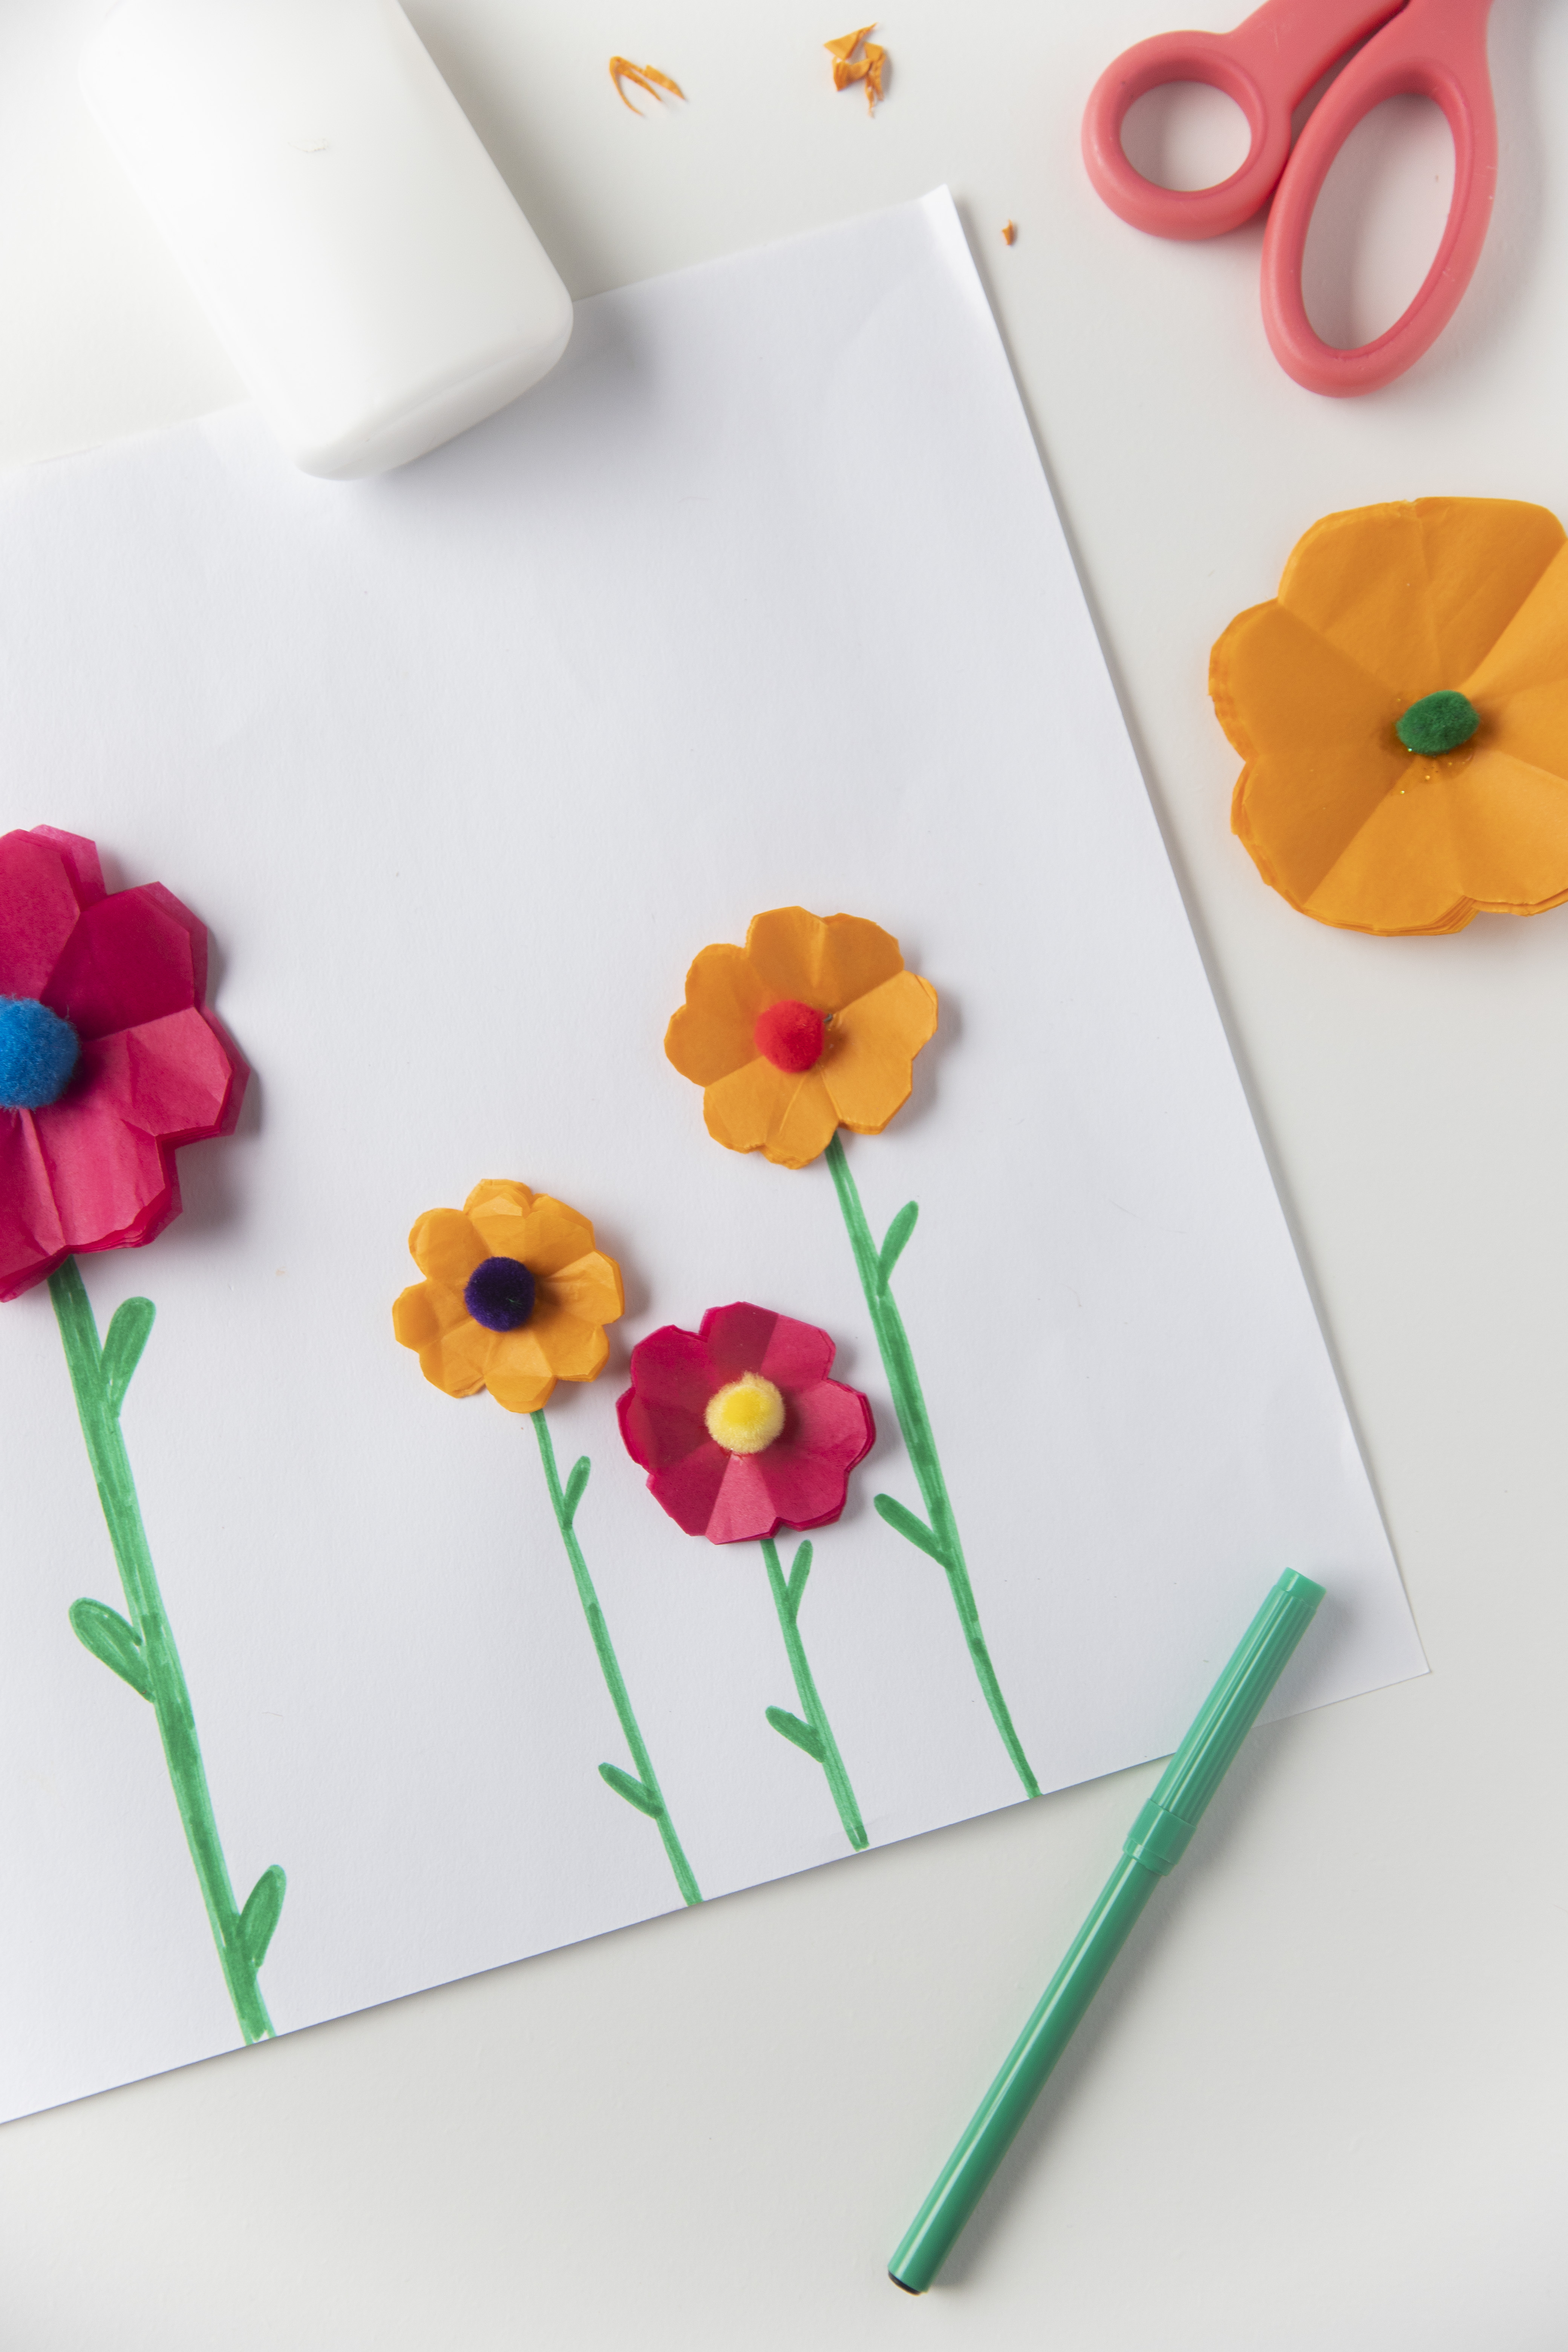
Glue a pom pom or sequin right in the middle, covering the staple.
You did it!
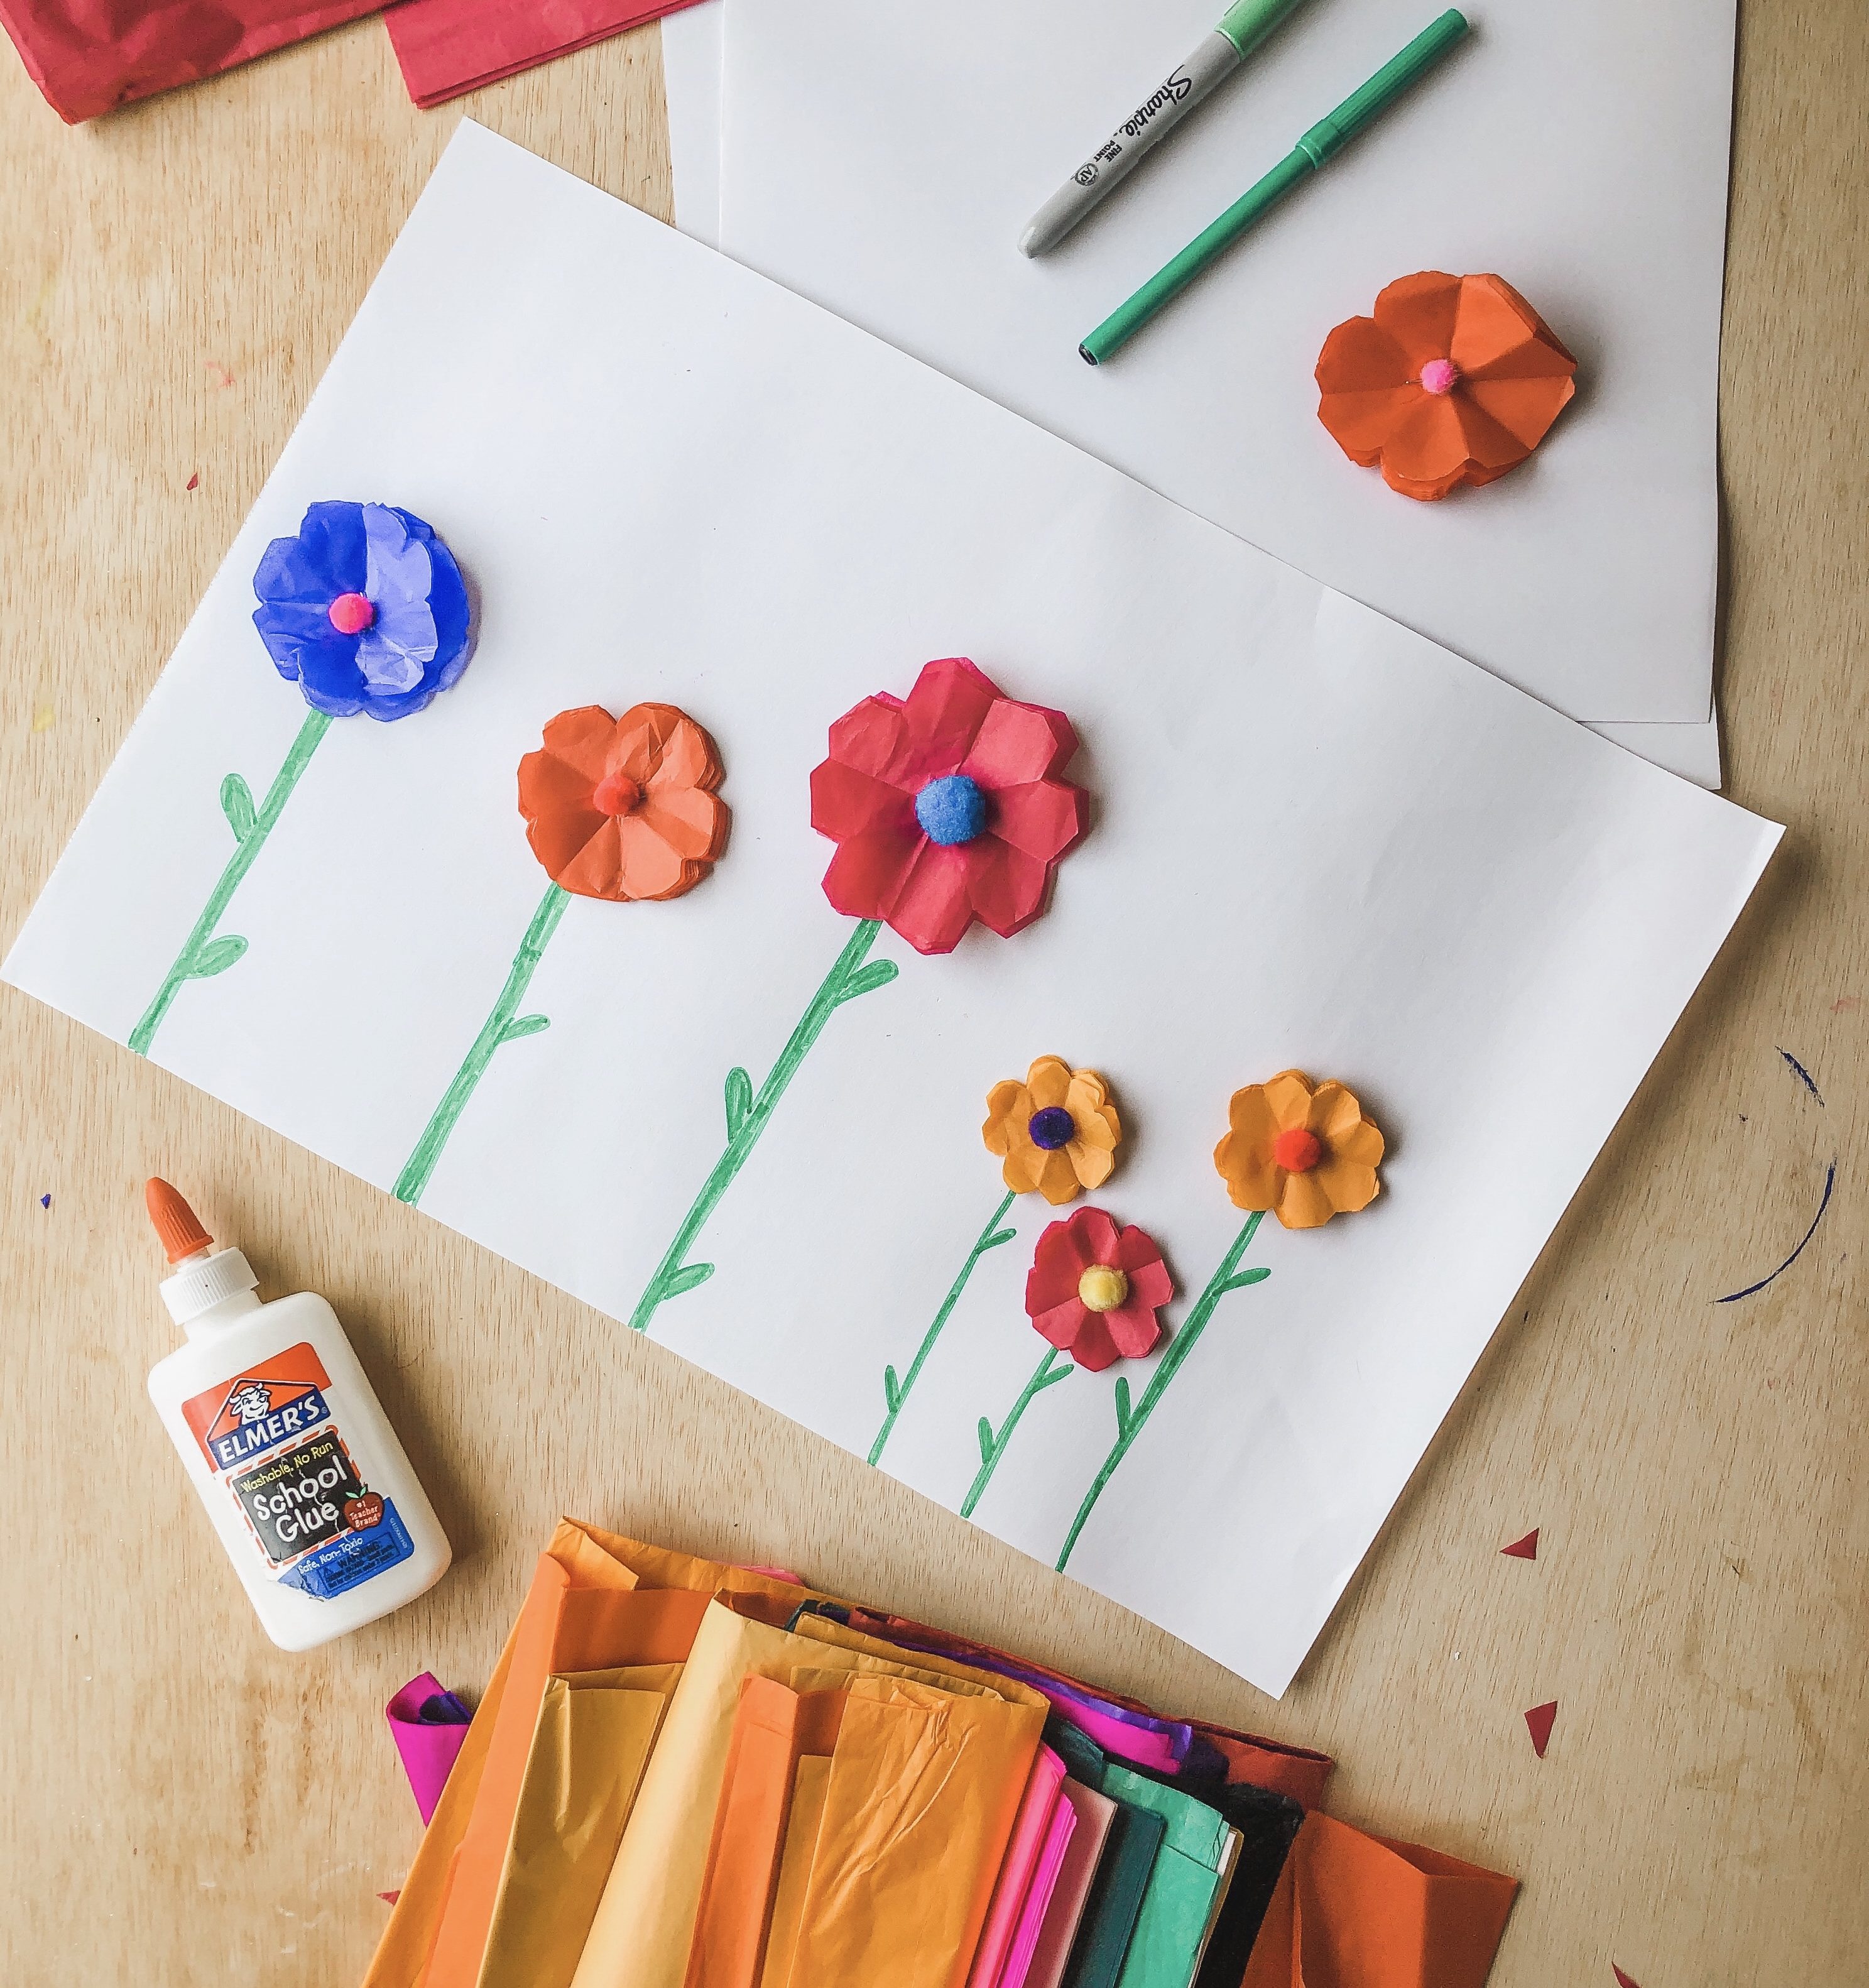
Now you can create several more for your spring field scene. It’ll get easier the more you do it.
Step 11:
Lay your finished flowers on a sheet of art paper, place them how you’d like them, and then add details like stems and leaves with a marker.

Into crafts these days with your kids?
Here a few other kids craft ideas at home:
Rainy Day Marshmallow Building
Also, here’s a list of our favorite supplies for a kids art center.
Happy crafting!
How to Make Tissue Paper Flower Art with Kids

These pretty tissue paper flower scene is a great craft to do with kids!
Active Time
10 minutes
10 minutes
Total Time
10 minutes
10 minutes
Materials
- art paper
- tissue paper in pretty spring colors
- scissors
- pencil
- stapler
- pom pom or other decor item for center of flower
- glue
- marker
Tools
- stapler
- scissors
- pencil
Instructions
1. Cut a small square with about 8-10 sheets of tissue paper. It doesn’t have to be this size exactly, but this will be about what the finished size will be.
2. Fold the paper in half, and draw a semi-circle (rainbow!) with a pencil. Be sure the folded section of the tissue paper is as the bottom of the rainbow.
Tip: Be sure to start/end the rainbow at the edges, and touch the top
3. Cut the semi-circle out.
4. Fold the semi-circle in half matching the end to end to make a big slice of pizza.
5. the pizza in half to make an even more narrow piece.
TIP: You can even fold it AGAIN if you wanted more detail in the petals. But it’ll be harder to cut with every fold in step 6!
6. With your pencil, draw a wide rainbow, similar to Step 2
7. Cut those edges of the rainbow off like you did in Step 3. You’re making an even more rounded piece (like an ice cream cone!)
8. Carefully open it up and try to find that center piece to reveal your pretty flower petals!
9. Staple right in the middle of your flower to keep all the tissue paper layers together.
10. Glue a pom pom or sequin right in the middle, covering the staple
11. Lay your finished flowers on a sheet of art paper, place them how you’d like them, and then add details like stems and leaves with a marker.
hello everyone,
thankyou for sharing this work , i really like this crafting work and this will also help in real life,also kindly visit site https://www.futuresolarwa.com.au/
I really love it.
http://www.recantodossonhos.com.br